A.3. Creating Customers and Pilot Subscribers

A.3.1. Creating a PBX Customer
A.3.2. Creating a PBX Pilot Subscriber

As with a normal SIP Account, you have to create a Customer contract per customer, and one Subscriber, which the customer can use to log into the web interface and manage his PBX environment.
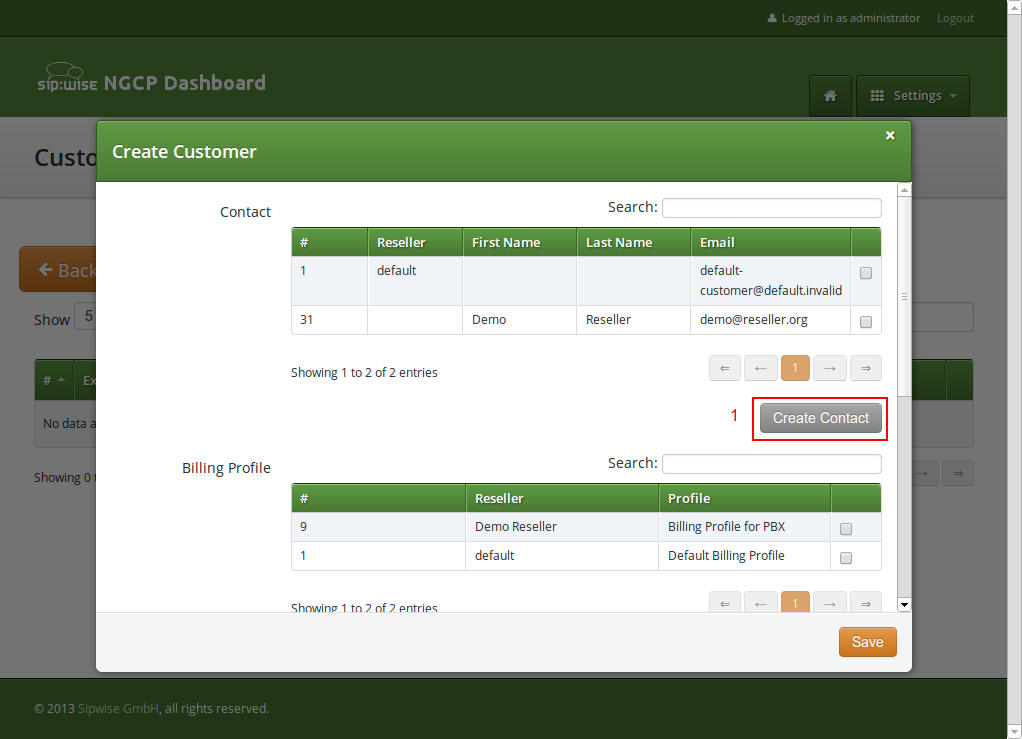
A.3.1. Creating a PBX Customer

Go to SettingsCustomers and click Create Customer. We need a Contact for the customer, so press Create Contact.

Figure A.12. Create PBX Customer Part 1

Create PBX Customer Part 1

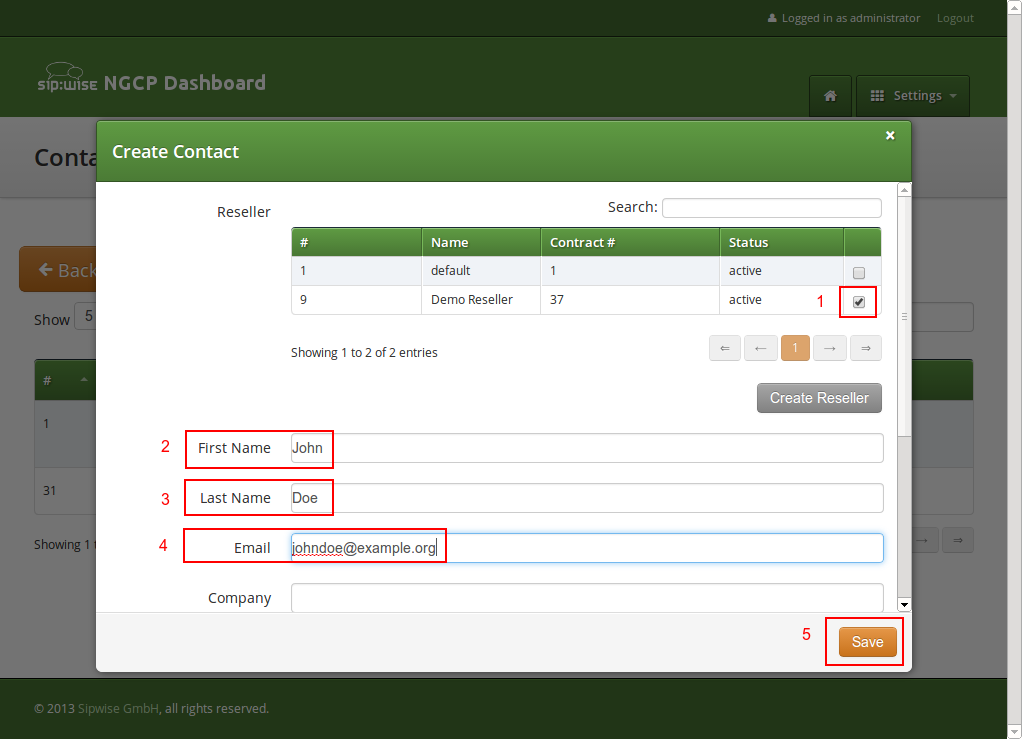
Fill in the desired fields (you need to provide at least the Email Address) and press Save.

Figure A.13. Create PBX Customer Contact

Create PBX Customer Contact

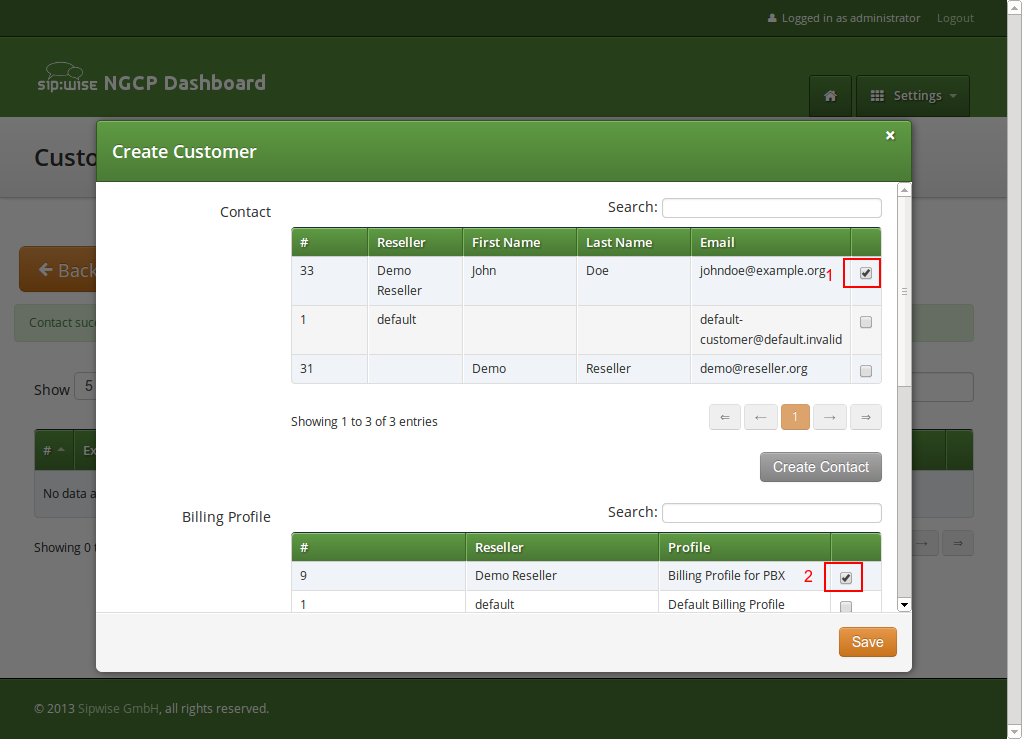
The new Contact will be automatically selected now. Also select a Billing Profile you want to use for this customer. If you don’t have one defined yet, press Create Billing Profile, otherwise select the one you want to use.

Figure A.14. Create PBX Customer Part 2

Create PBX Customer Part 2

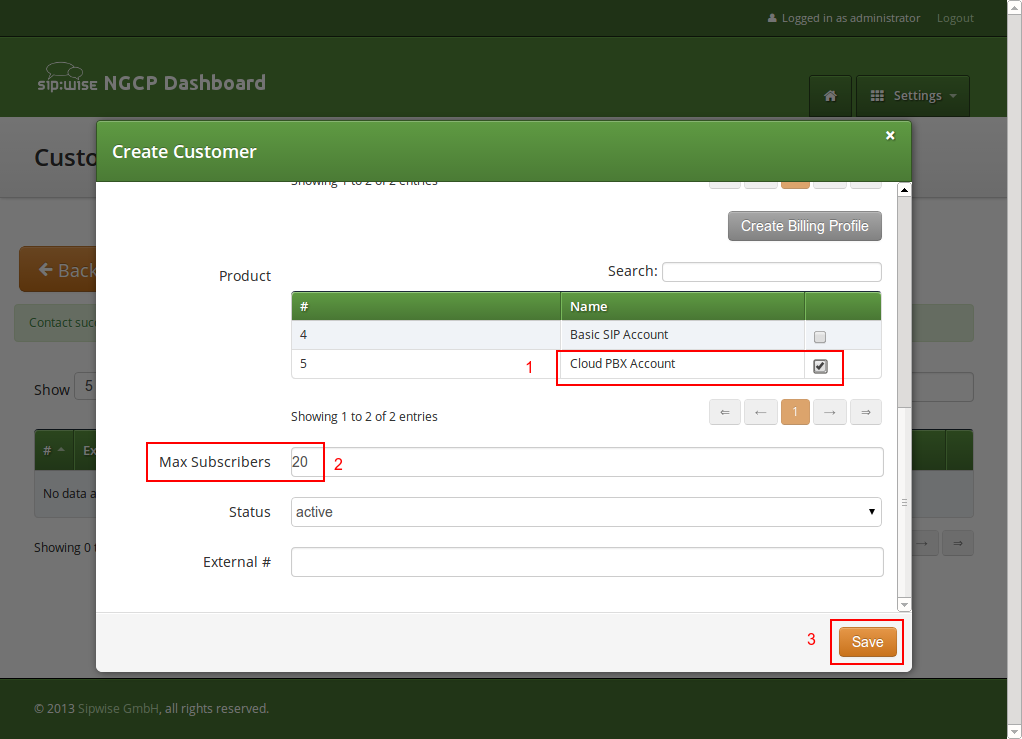
Next, you need to select the Product for the PBX customer. Since it’s going to be a PBX customer, select the product Cloud PBX Account.

Since PBX customers are supposed to manage their subscribers by themselves, they are able to create them via the web interface. To set an upper limit of subscribers a customer can create, define the value in the Max Subscribers field.

[Important]

As you will see later, both PBX subscribers and PBX groups are normal subscribers, so the value defined here limits the overall amount of subscribers and groups. A customer can create an unlimited amount of subscribers if you leave this field empty.

Press Save to create the customer.

Figure A.15. Create PBX Customer Part 3

Create PBX Customer Part 3

A.3.2. Creating a PBX Pilot Subscriber

Once the customer is created, you need to create at least one Subscriber for the customer, so he can log into the web interface and manage the rest by himself.

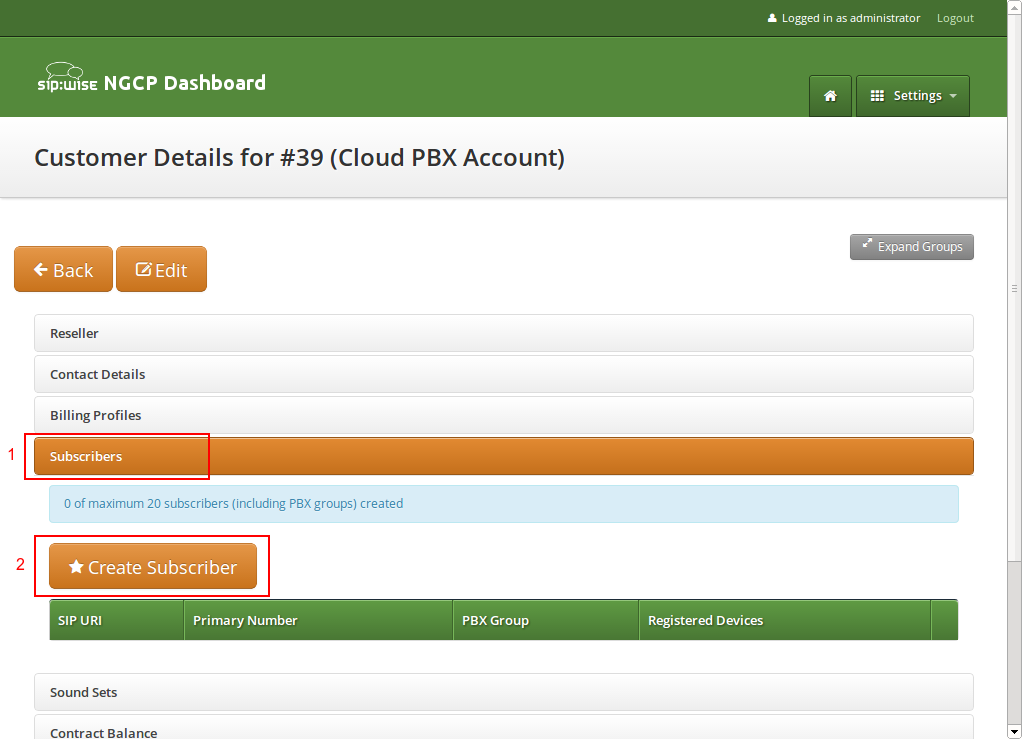
Click the Details button on the newly created customer to enter the detailed view.

Figure A.16. Go to Customer Details

Go to Customer Details

To create the subscriber, open the Subscribers row and click Create Subscriber.

Figure A.17. Go to Create Subscriber

Go to Create Subscriber

For your pilot subscriber, you need a SIP domain, a pilot number (the main number of the customer PBX), the web credentials for the customer to log into the web interfaces, and the SIP credentials to authenticate via a SIP device.

[Important]

In a PBX environment, customers can create their own subscribers. As a consequence, each PBX customer should have its own SIP domain, in order to not collide with subscribers created by other customers. This is important because two customers are highly likely to create a subscriber (or group, which is also just a subscriber) called office. If they are in the same SIP domain, they’d both have the SIP URI office@pbx.example.org, which is not allowed, and the an end customer will probably not understand why office@pbx.example.org is already taken, because he (for obvious reasons, as it belongs to a different customer) will not see this subscriber in his subscribers list.

[Tip]

To handle one domain per customer, you should create a wild-card entry into your DNS server like *.pbx.example.org, which points to the IP address of pbx.example.org, so you can define SIP domains like customer1.pbx.example.org or customer2.pbx.example.org without having to create a new DNS entry for each of them. For proper secure access to the web interface and to the SIP and XMPP services, you should also obtain a SSL wild-card certificate for *.pbx.example.org to avoid certification warnings on customers' web browsers and SIP/XMPP clients.

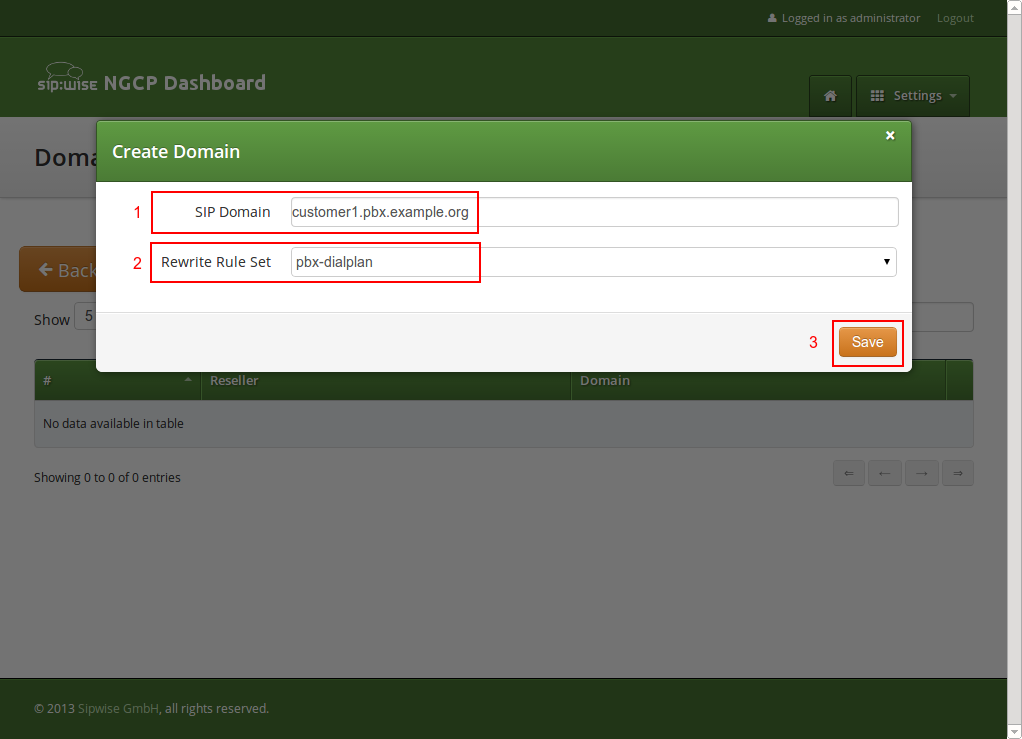
So to create a new domain for the customer, click Create Domain.

Figure A.18. Go to Create Customer Domain

Go to Create Customer Domain

Specify the domain you want to create, and select the PBX Rewrite Rule Set which you created in Section A.2, “Preparing PBX Rewrite Rules”, then click Save.

Figure A.19. Create Customer Domain

Create Customer Domain

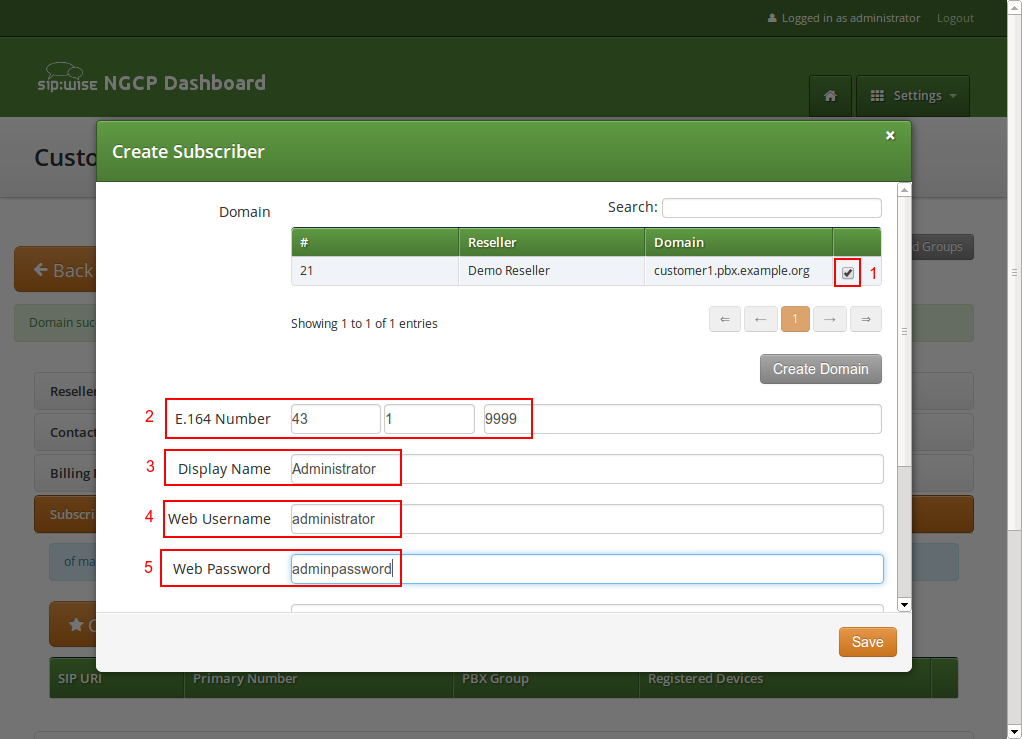
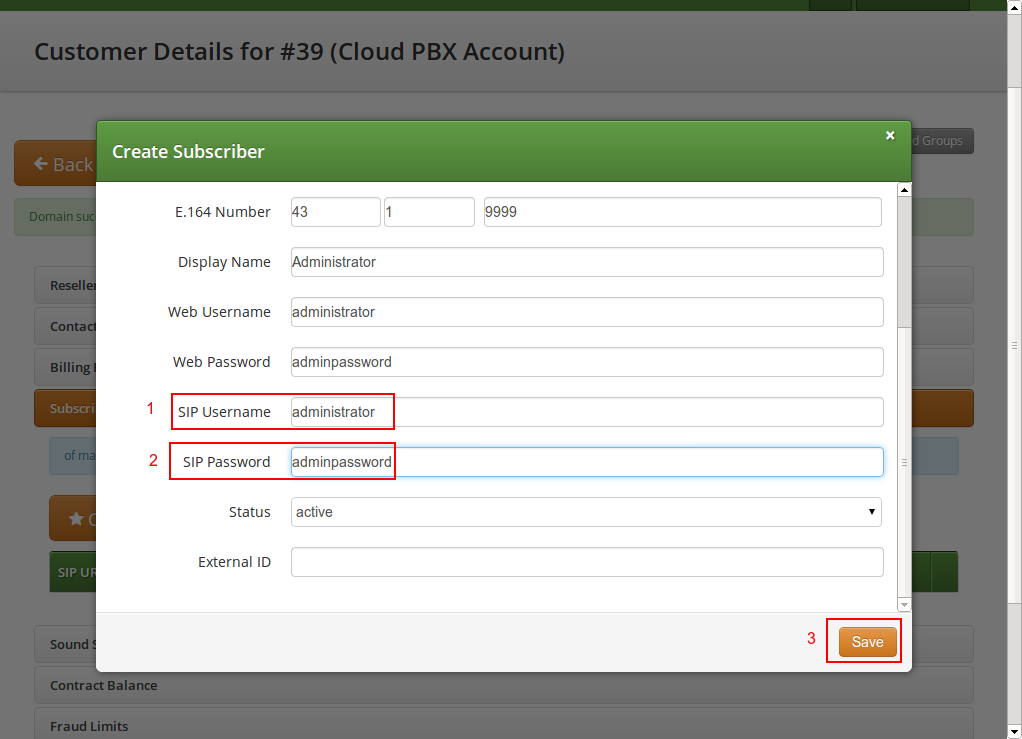
Finish the subscriber creation by providing an E.164 number, which is going to be the base number for all other subscribers within this customer, the web username and password for the pilot subscriber to log into the web interface, and the sip username and password for a SIP device to connect to the PBX.

The parameters are as follows:

  • Domain: The domain in which to create the pilot subscriber. Each customer should get his own domain as described above to not collide with SIP usernames between customers.
  • E.164 Number: The primary number of the PBX. Calls to this number are routed to the pilot subscriber, and each subsequent subscriber created for this customer will use this number as its base number, suffixed by an individual extension. You can later assign alias numbers also for DID support.
  • Display Name: This field is used on phones to identify subscribers by their real names instead of their number or extension. On outbound calls, the display name is signalled in the Display-Field of the From header, and it’s used as a name in the XMPP contact lists.
  • Web Username: The username for the subscriber to log into the customer self-care web interface. This is optional, if you don’t want a subscriber to have access to the web interface.
  • Web Password: The password for the subscriber to log into the customer self-care web interface.
  • SIP Username: The username for the subscriber to authenticate on the SIP and XMPP service. It is automatically used for devices, which are auto-provisioned via the Device Management, or can be used manually by subscribers to sign into the SIP and XMPP service with any arbitrary clients.
  • SIP Password: The password for the subscriber to authenticate on the SIP and XMPP service.

Figure A.20. Create Pilot Subscriber Part 1

Create Pilot Subscriber Part 1

Figure A.21. Create Pilot Subscriber Part 2

Create Pilot Subscriber Part 2

Once the subscriber is created, he can log into the customer self-care interface at https://<your-ip>/login/subscriber and manage his PBX, like creating other users and groups, assigning Devices to subscribers and configure the Auto Attendant and more.