| |
| |
The sip:provider CE allows to generate and send customer invoices for each billing period based on Calls Detailed Records (CDR). Generated invoices can be sent to customers emails using invoice generation script Section 10.3, “Invoices generation”.
Invoices present billing information from the reseller point of view. Recipients of the invoices are customers. Invoices include information related to the calls made by subscribers associated with the customer.
By default invoice contains information about billing plan fixed fee, calls zones fees and calls detailed information.
Content and vision of the invoices are customizable by invoice templates Section 10.2, “Invoice templates”.
The sip:provider CE generates invoices in pdf format. |
Invoices can be requested for generation, searched, downloaded and deleted in the invoices interface.
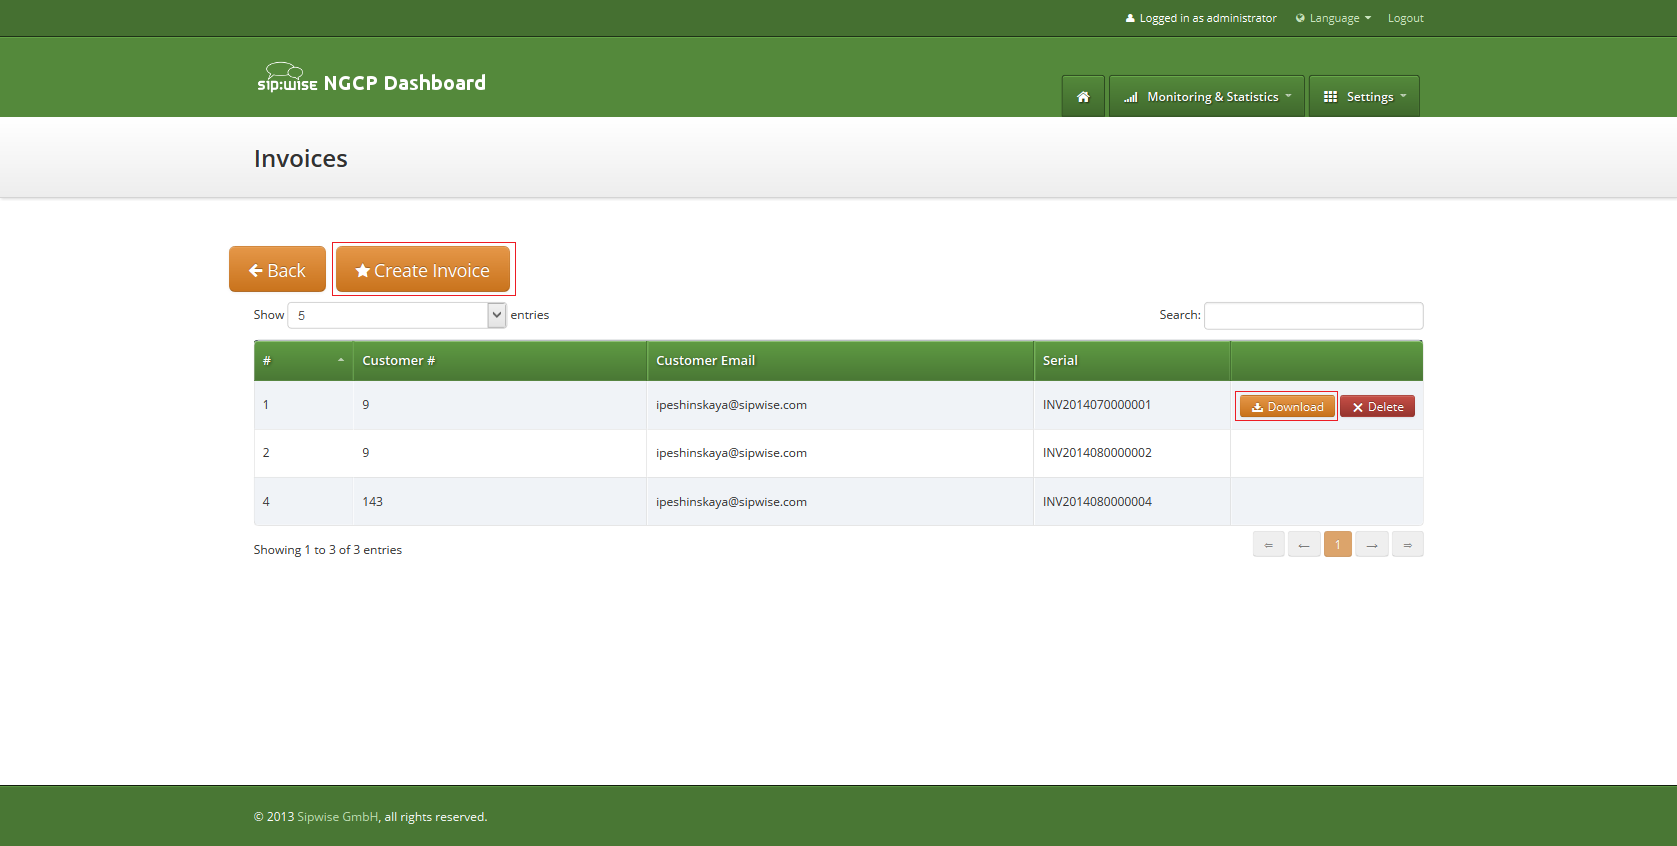
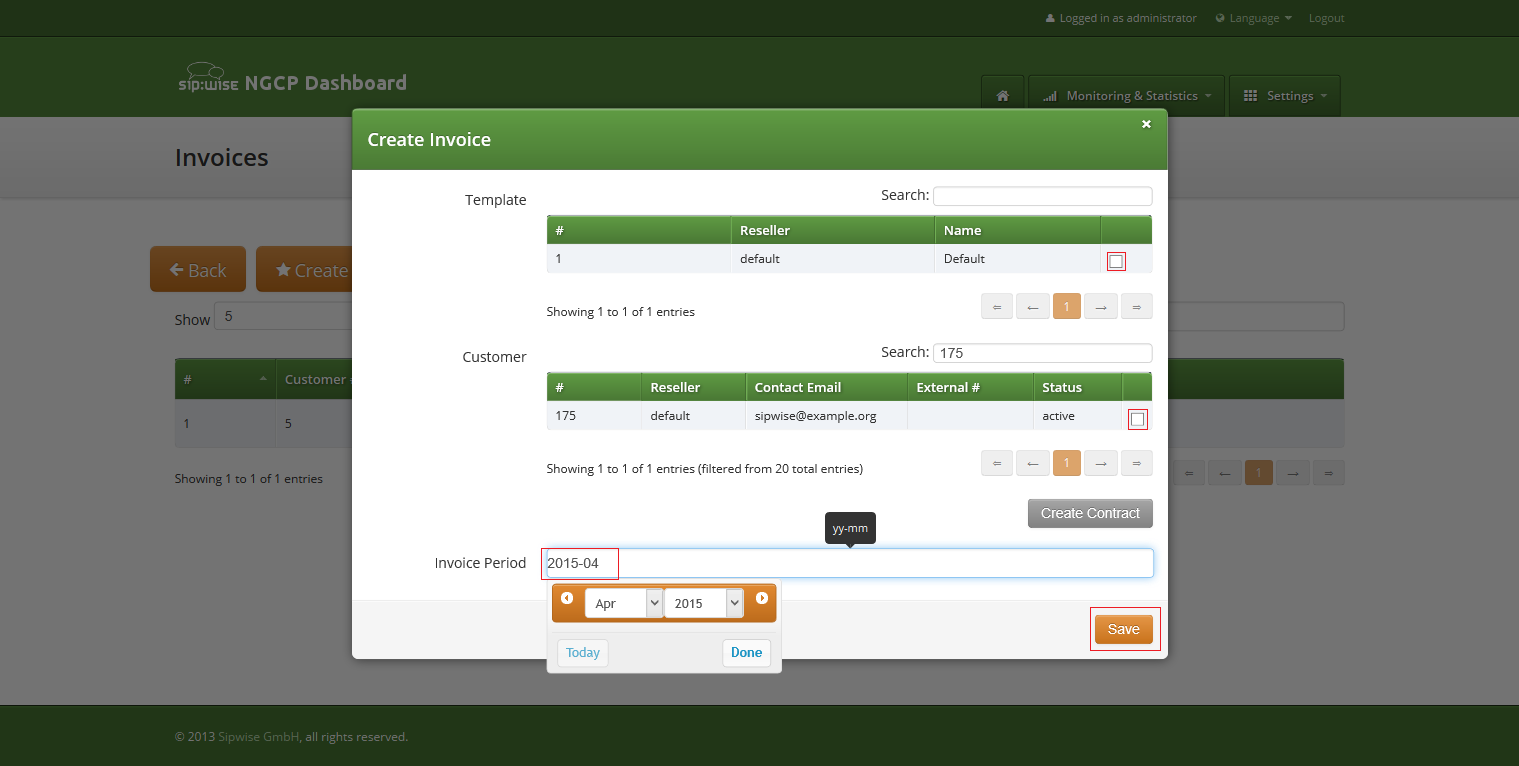
To request invoice generation for the particular customer and period press "Create invoice" button. On the invoice creation form following parameters are available for selection:
All form fields are mandatory.
Generated invoice can be downloaded as pdf file.
To do it press button "Download" against invoice in the invoice management interface.
Respectively press on the button "Delete" to delete invoice.
Invoice template defines structure and look of the generated invoices. The sip:provider CE allows to create some invoice templates. Multiple invoice templates can be used to send invoices to the different customers using different languages.
At least one invoice template should be created to enable invoice generation. Each customer has to be associated to one of the existent invoice template, otherwise invoices will be not generated for this customer. |
Customer can be linked to the invoice template in the customer interface.
Invoice templates can be searched, created, edited and deleted in the invoice templates management interface.
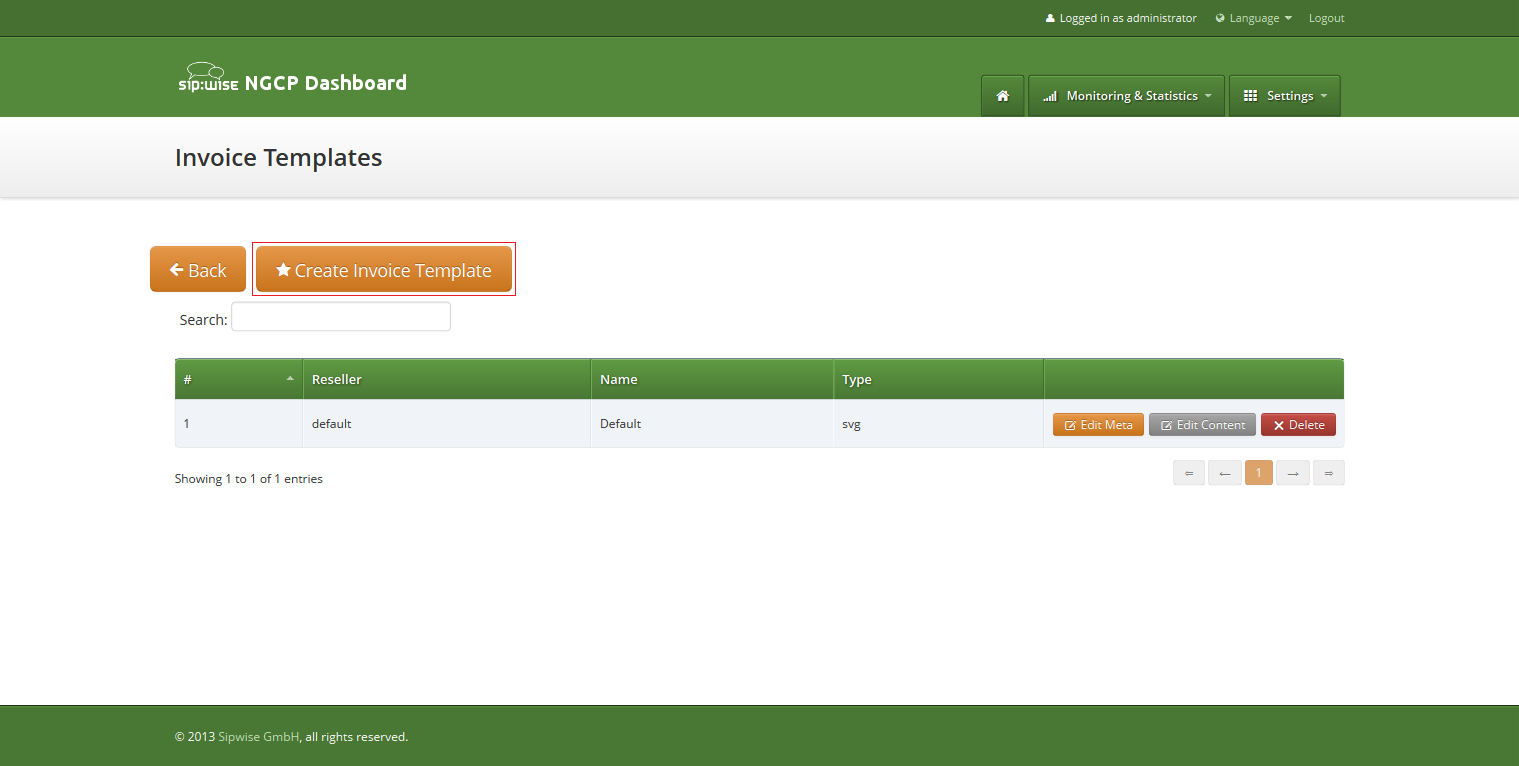
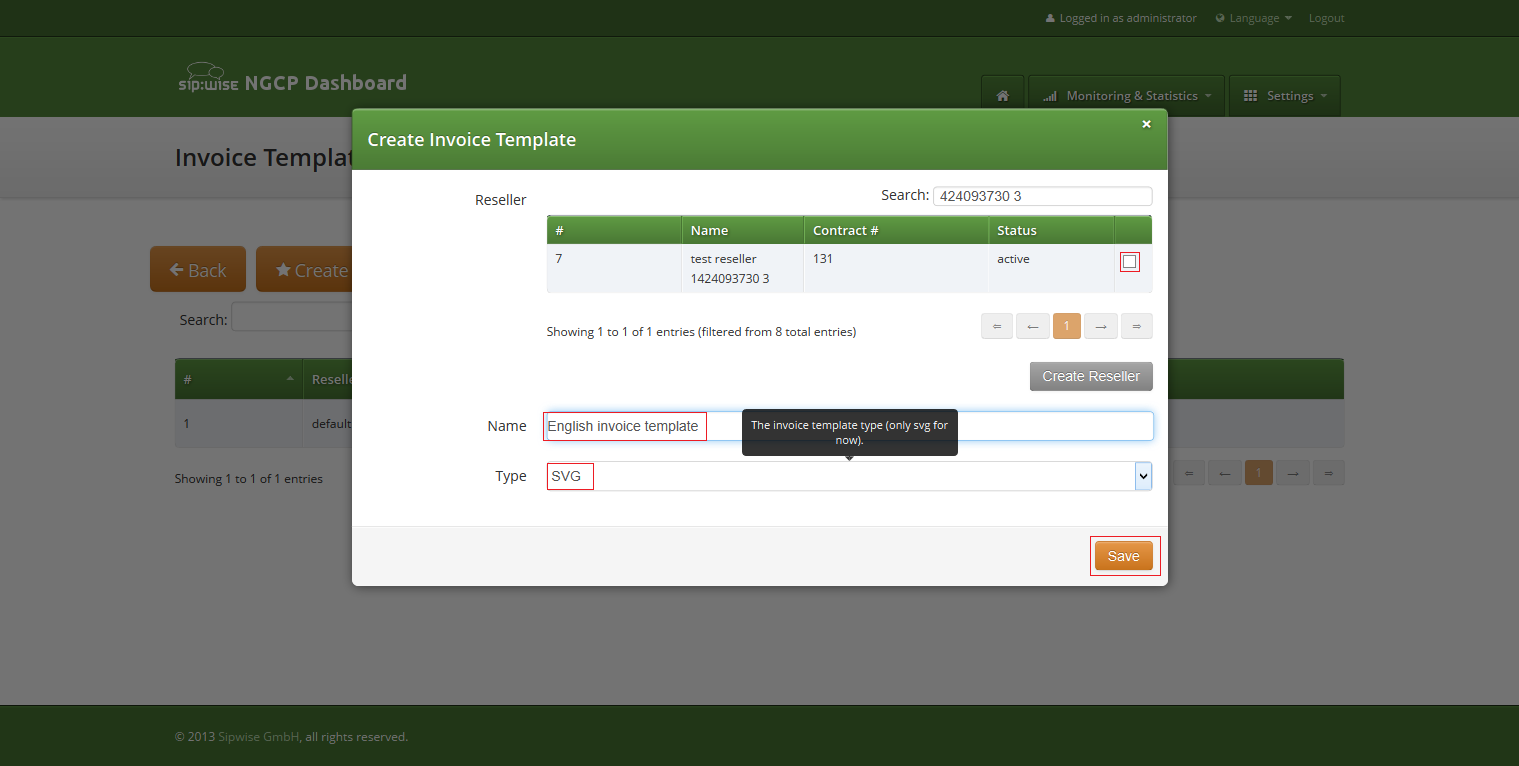
Invoice template creation is separated on two steps:
To register new invoice template press "Create Invoice Template" button.
On the invoice template meta information form following parameters can be specified:
All form fields are mandatory.
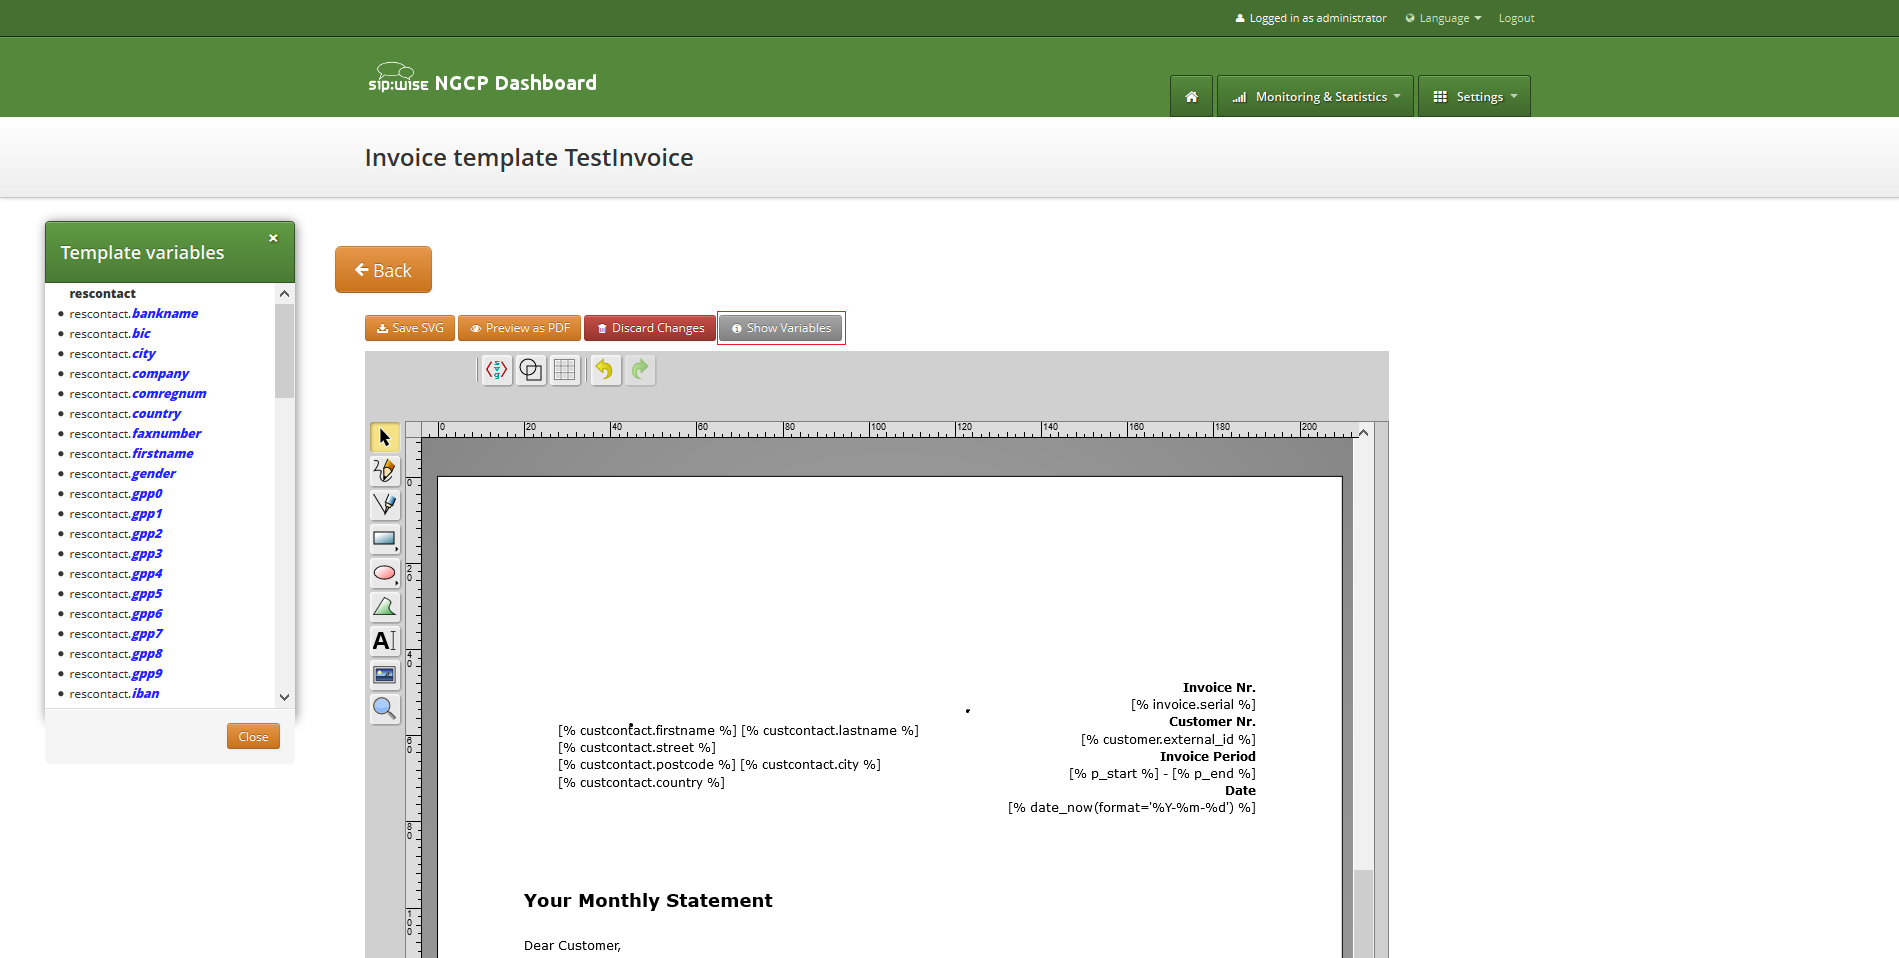
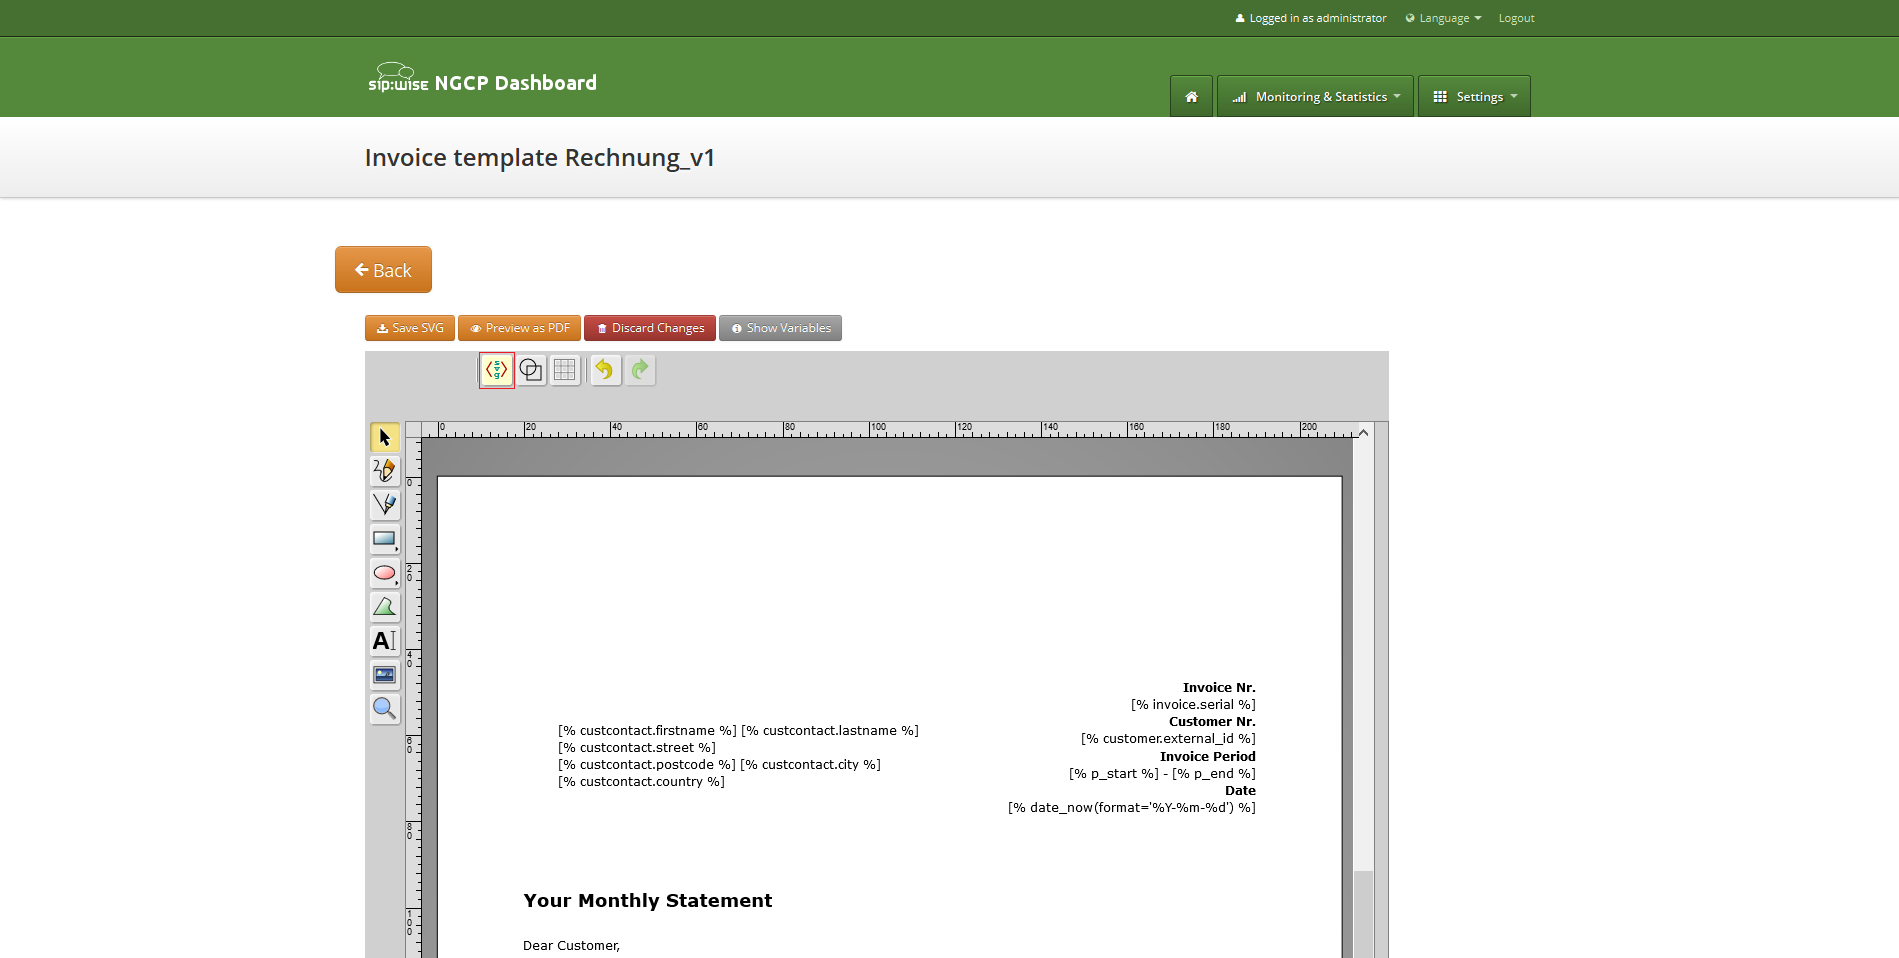
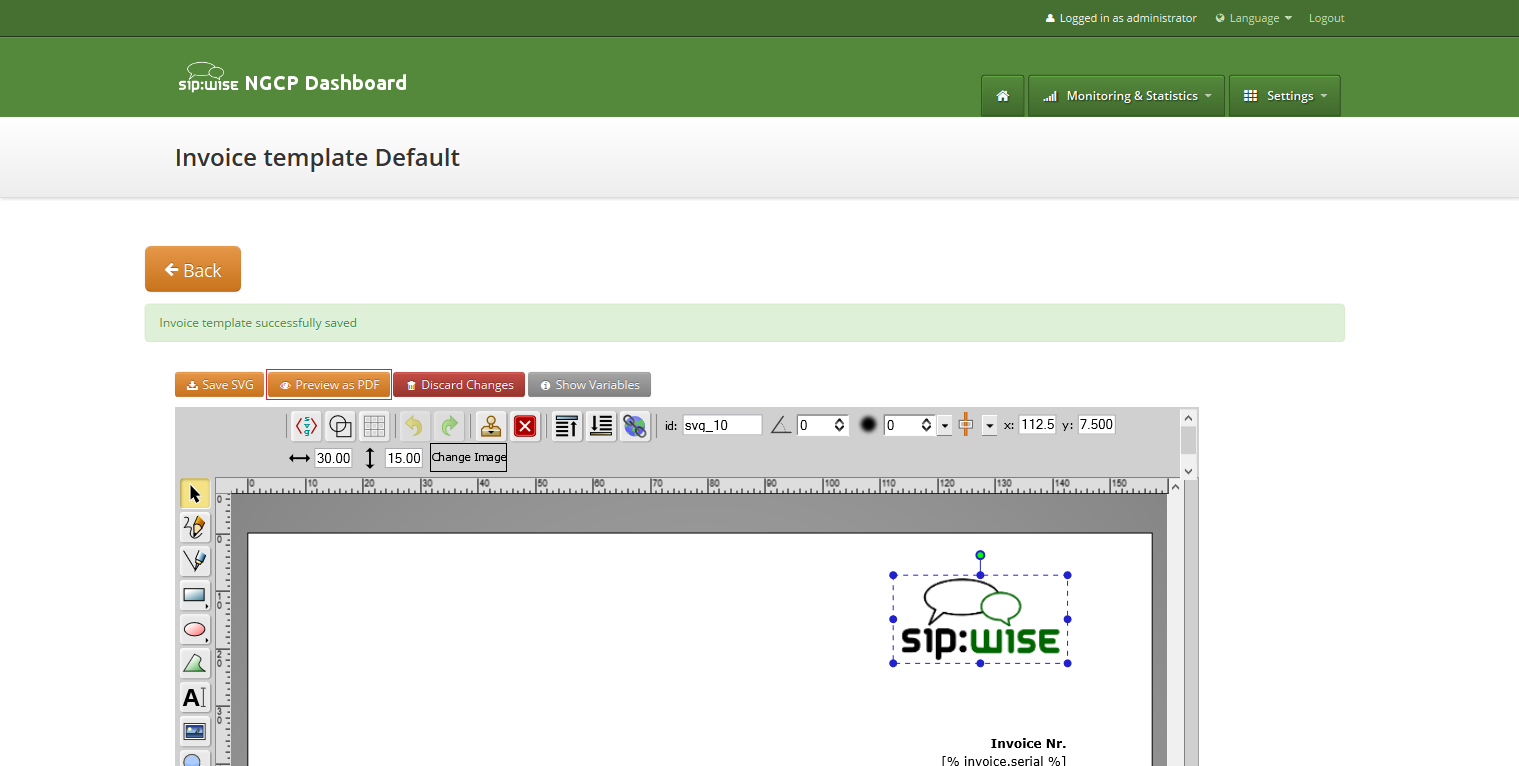
After registering new invoice template you can change invoice template structure in WYSIWYG SVG editor and preview result of the invoice generation based on the template.
Invoice template is a XML SVG source, which describes content, look and position of the text lines, images or other invoice template elements. The sip:provider CE provides embedded WYSIWYG SVG editor svg-edit 2.6 to customize default template. The sip:provider CE svg-edit has some changes in layers management, image edit, user interface, but this basic introduction still may be useful.
Template refers to the owner reseller contact ("rescontact"), customer contract ("customer"), customer contact ("custcontact"), billing profile ("billprof"), invoice ("invoice") data as variables in the "[%%]" mark-up with detailed information accessed as field name after point e.g. [%invoice.serial%]. During invoice generation all variables or other special tokens in the "[% %]" mark-ups will be replaced by their database values.
Press on "Show variables" button on invoice template content page to see full list of variables with the fields:
You can add/change/remove embedded variables references directly in main svg-edit window. To edit text line in svg-edit main window double click on the text and place cursor on desired position in the text.
After implementation of the desired template changes, invoice template should be saved Section 10.2.3, “Save and preview invoice template content.”.
To return to the sip:provider CE invoice template default content you can press on the "Discard changes" button.
"Discard changes" operation can’t be undone. |
Default template contains three groups elements (<g/>), which can be thinked of as pages, or in terms of svg-edit - layers. Layers are:
To see all invoice template layers, press on "Layers" vertical sign on right side of the svg-edit interface:
Side panel with layers list will be shown.
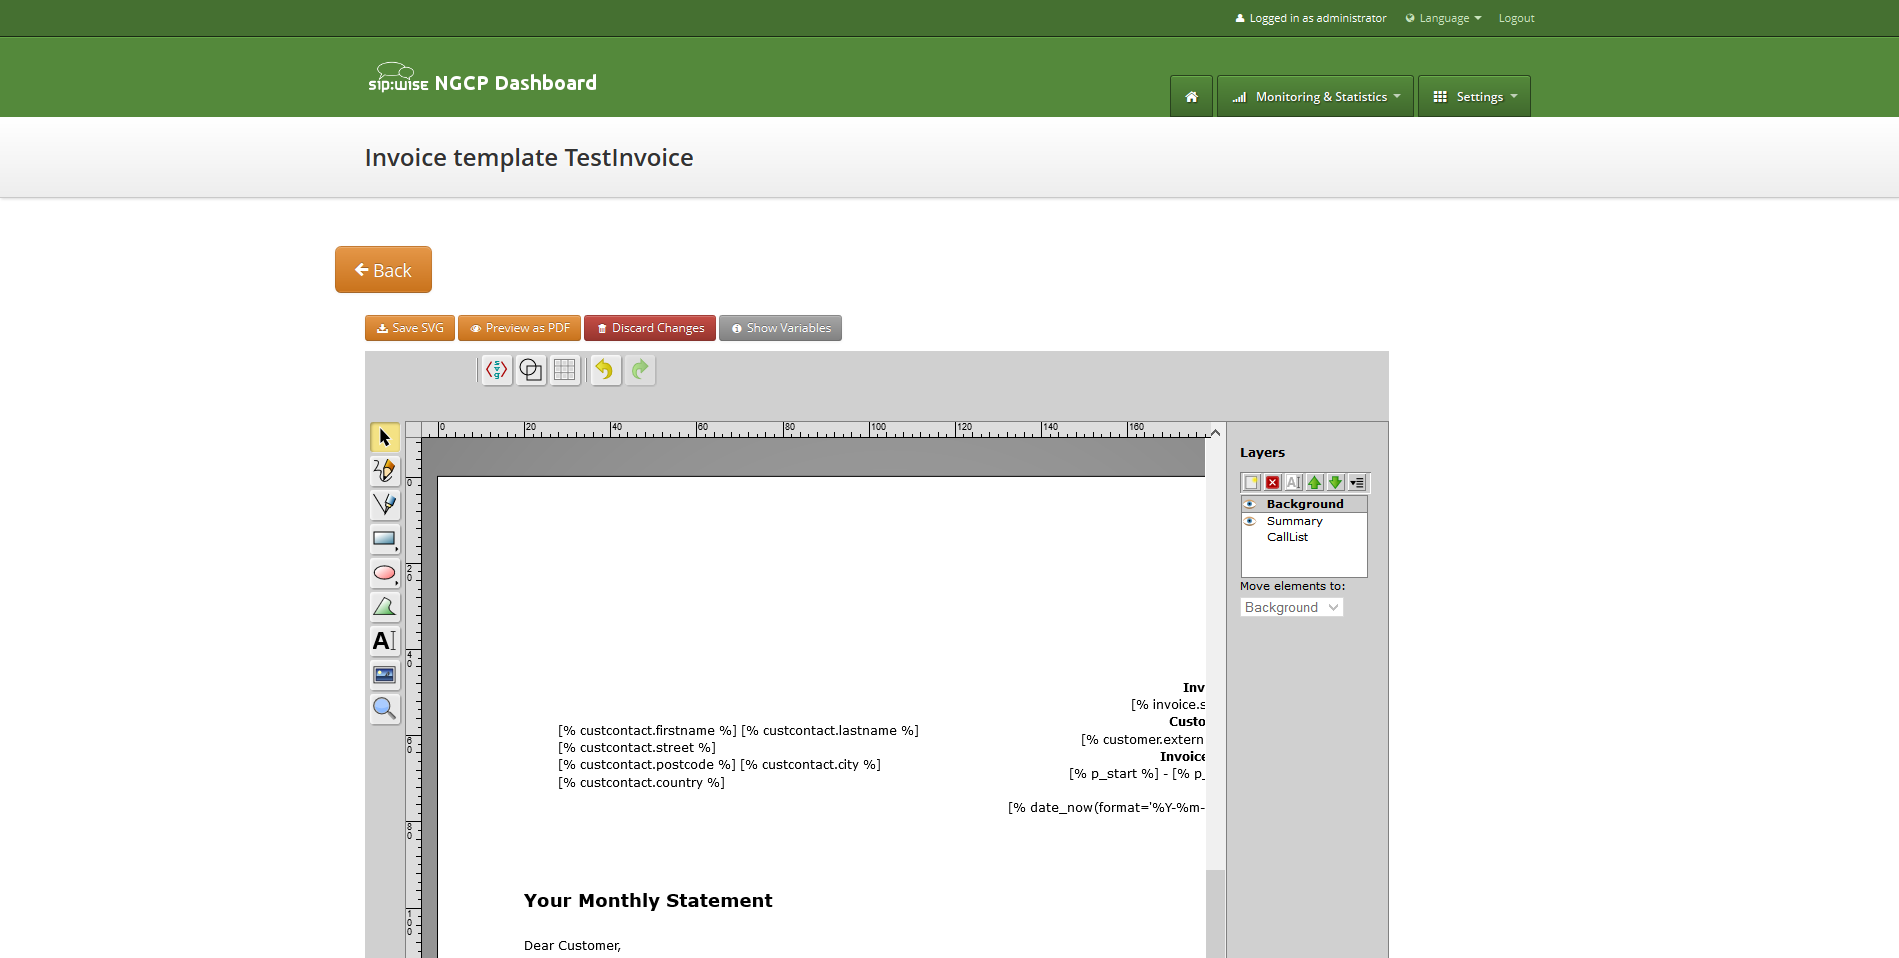
One of the layers is active, and its element can be edited in the main svg-edit window. Currently active layer’s name is bold in the layers list. The layers may be visible or invisible. Visible layers have "eye" icon left of their names in the layers list.
To make a layer active, click on its name in the layers list. If the layer was invisible, its elements became visible on activation. Thus you can see mixed elements of some layers, then you can switch off visibility of other layers by click on their "eye" icons. It is good idea to keep visibility of the "Background" layer on, so look of the generated page will be seen.
Sometimes it may be convenient to edit svg source directly and svg-edit allows to do it. After press on the <svg> icon in the top left corner of the svg-edit interface:
SVG XML source of the invoice template will be shown.
SVG source can be edited in place or just copy-pasted as usual text.
Template keeps sizes and distances in pixels. |
When edit svg xml source, please change very carefully and thinkfully things inside special comment mark-up "<!--{ }-→". Otherwise invoice generation may be broken. Please be sure that document structure repeats default invoice template: has the same groups (<g/>) elements on the top level, text inside special comments mark-up "<!--{ }-→" preserved or changed appropriately, svg xml structure is correct. |
To save your changes in the svg xml source, first press "OK" button on the top left corner of the source page:
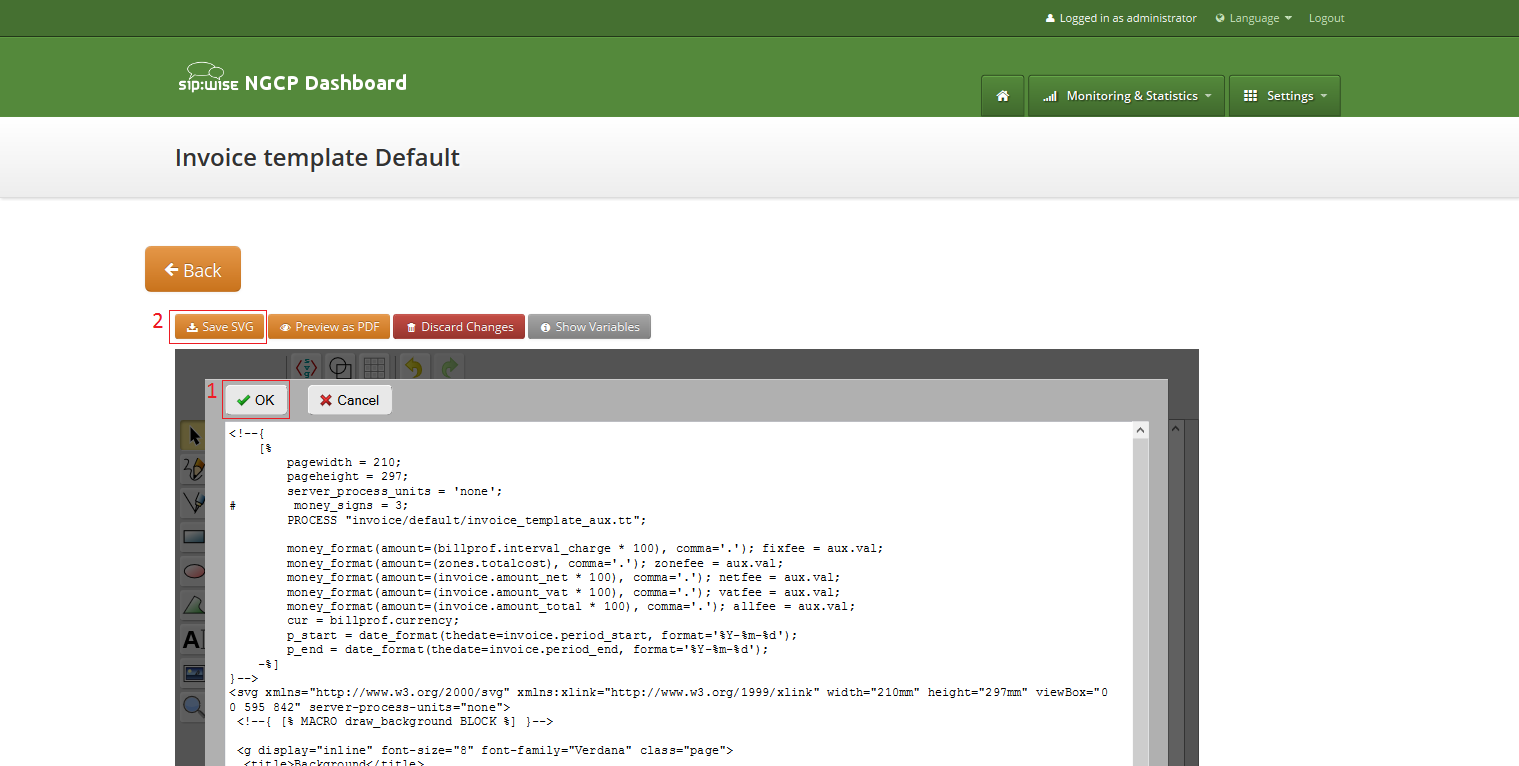
And then save invoice template changes Section 10.2.3, “Save and preview invoice template content.”.
You can copy and keep the svg source of your template as a file on the disk before start experimenting with the template. Later you will be able to return to this version replacing svg source. |
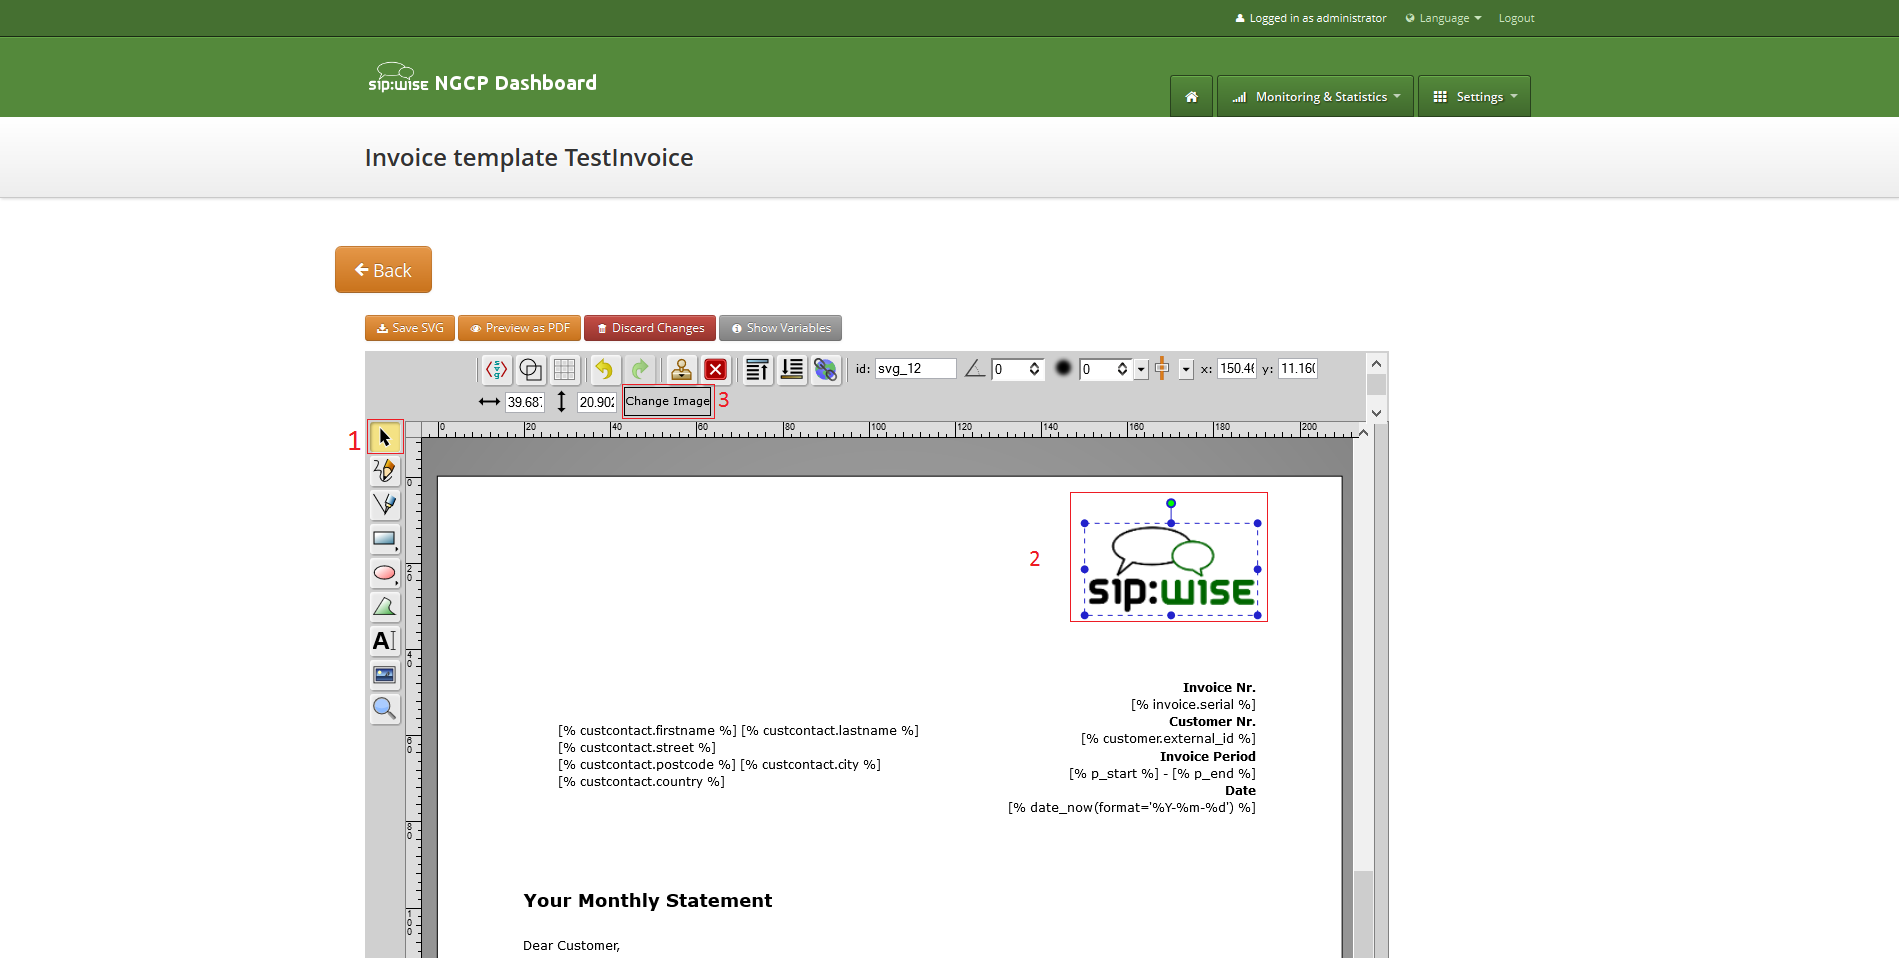
After image uploaded save invoice template changes Section 10.2.3, “Save and preview invoice template content.”.
To save invoice template content changes press button "Save SVG".
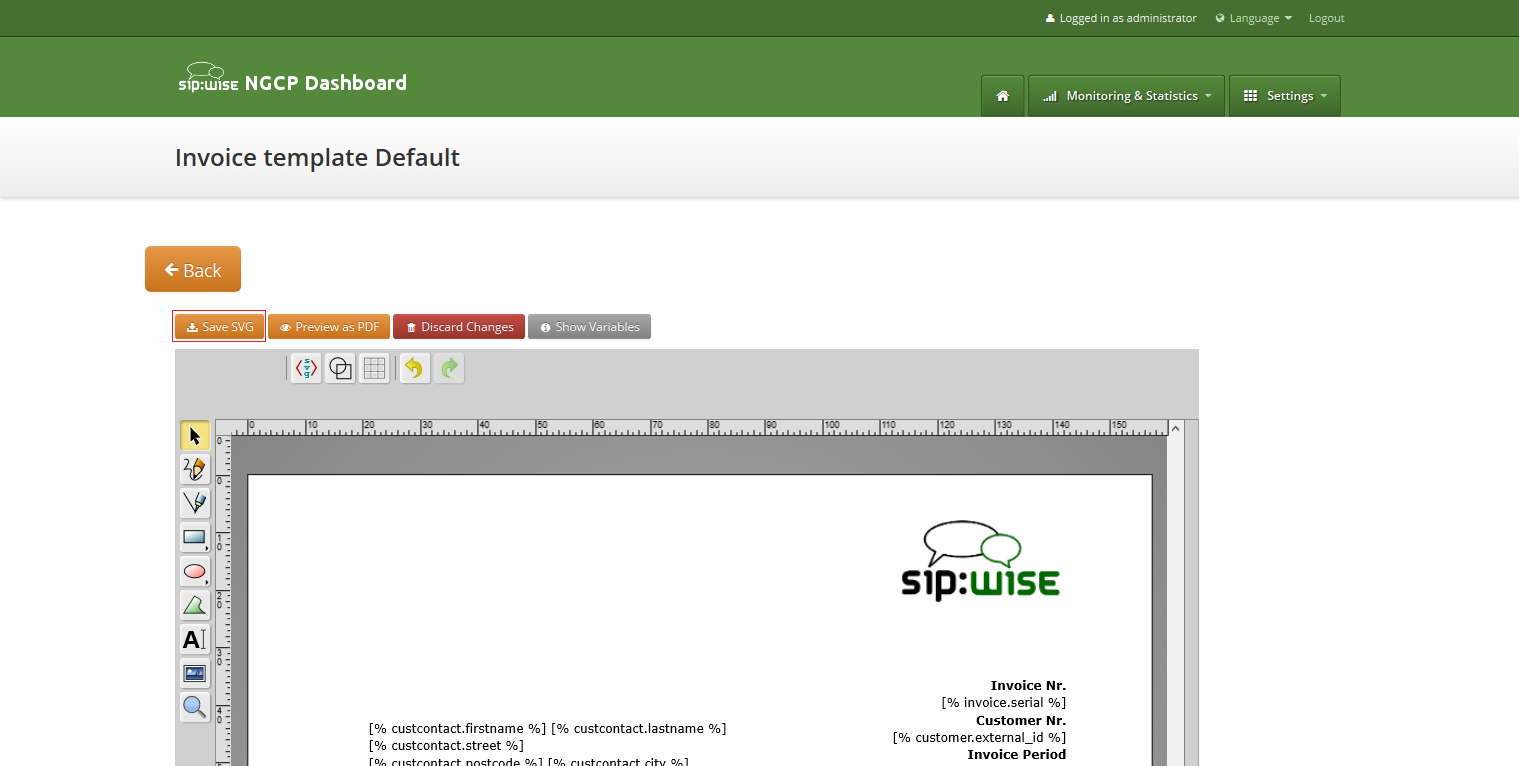
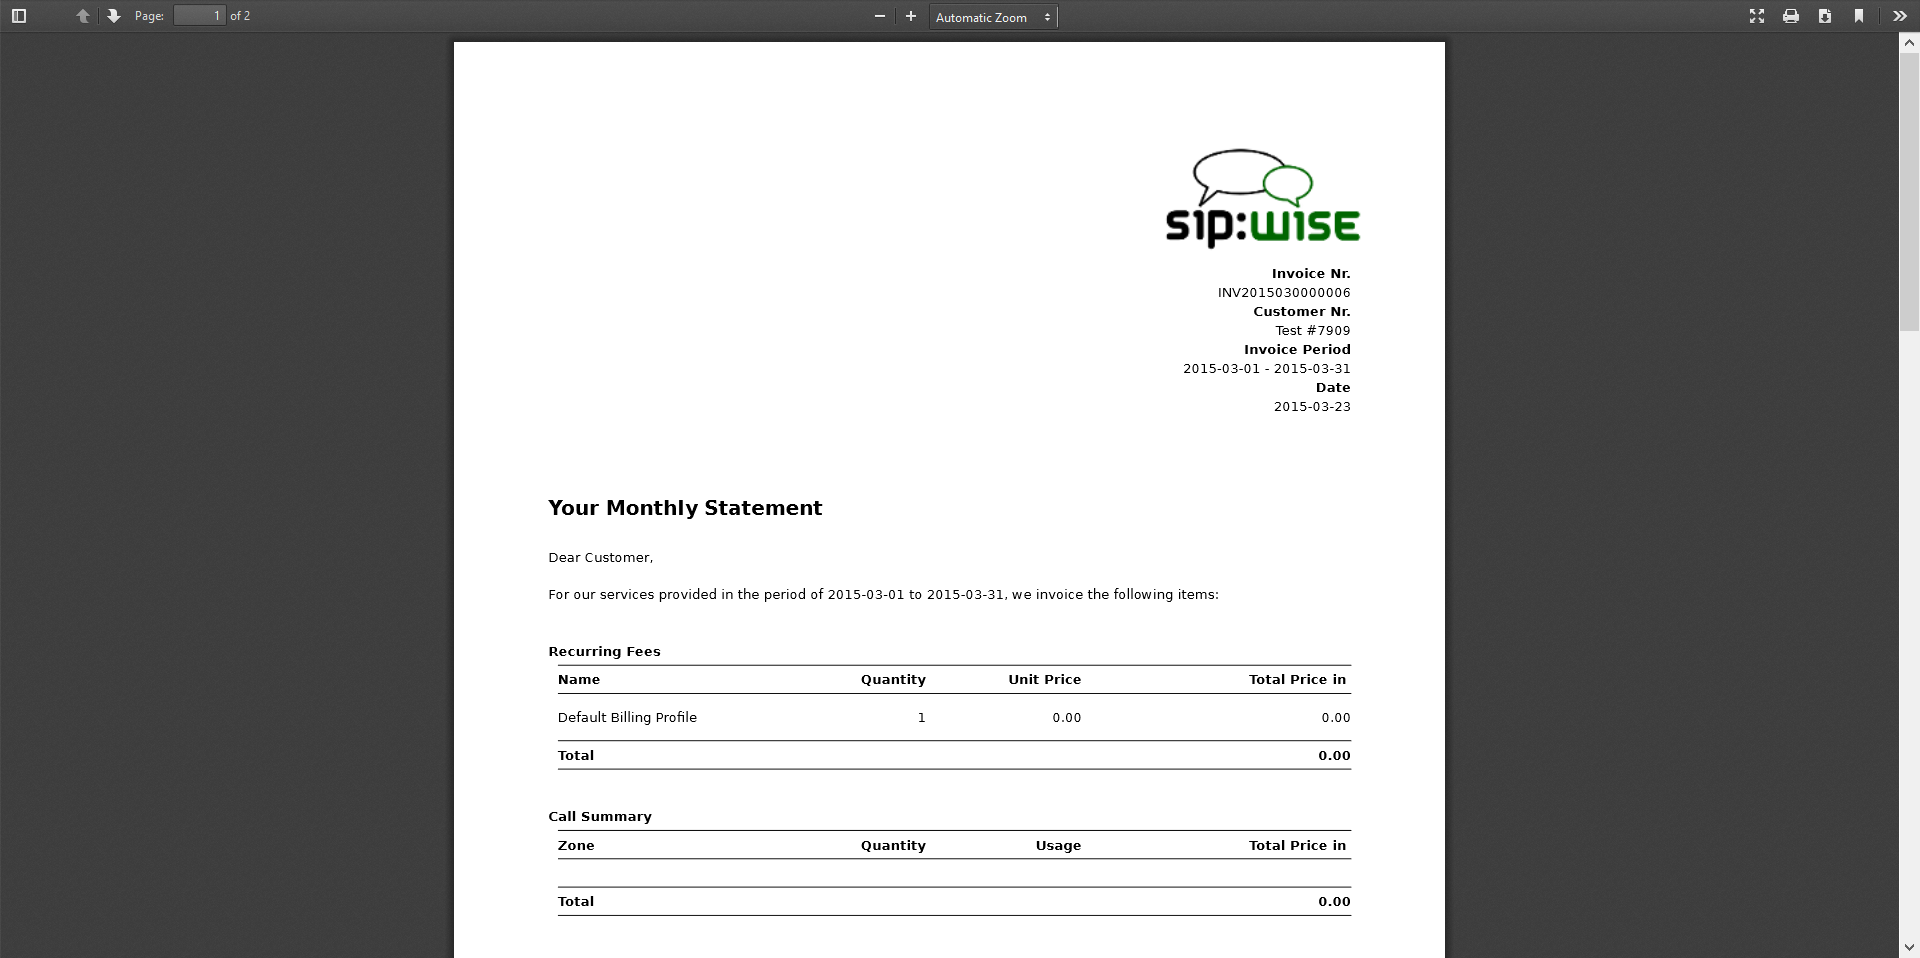
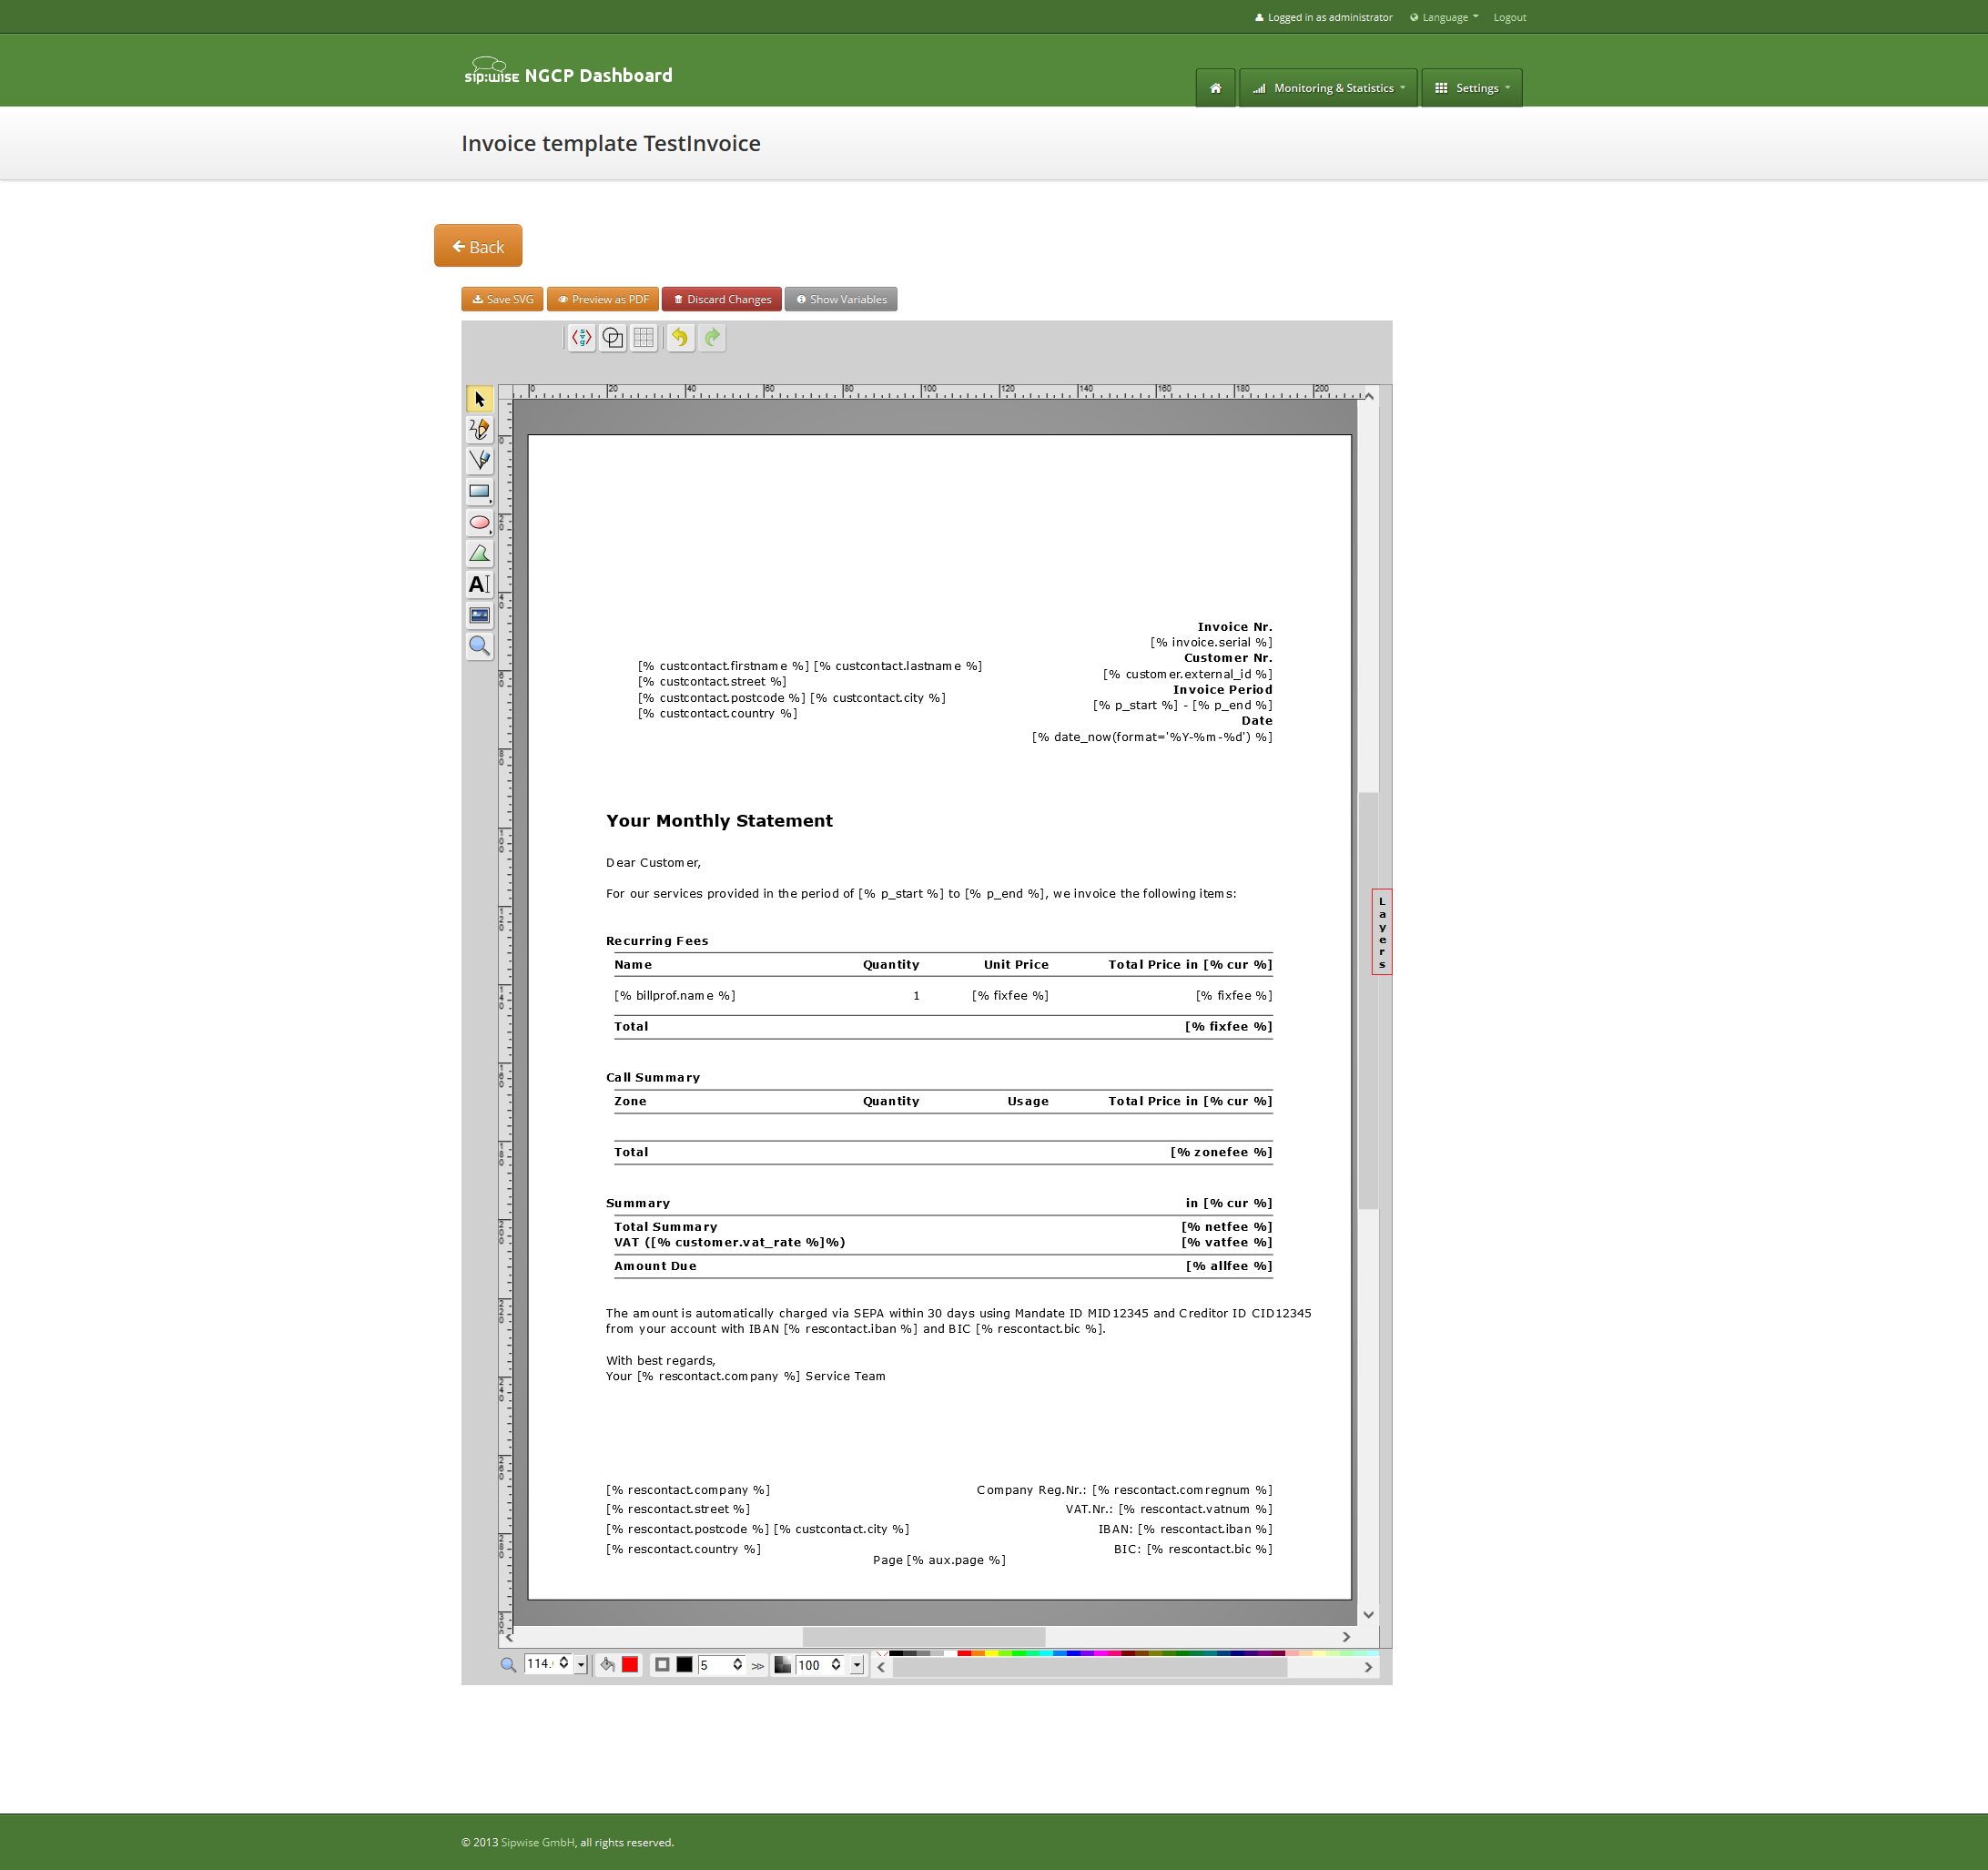
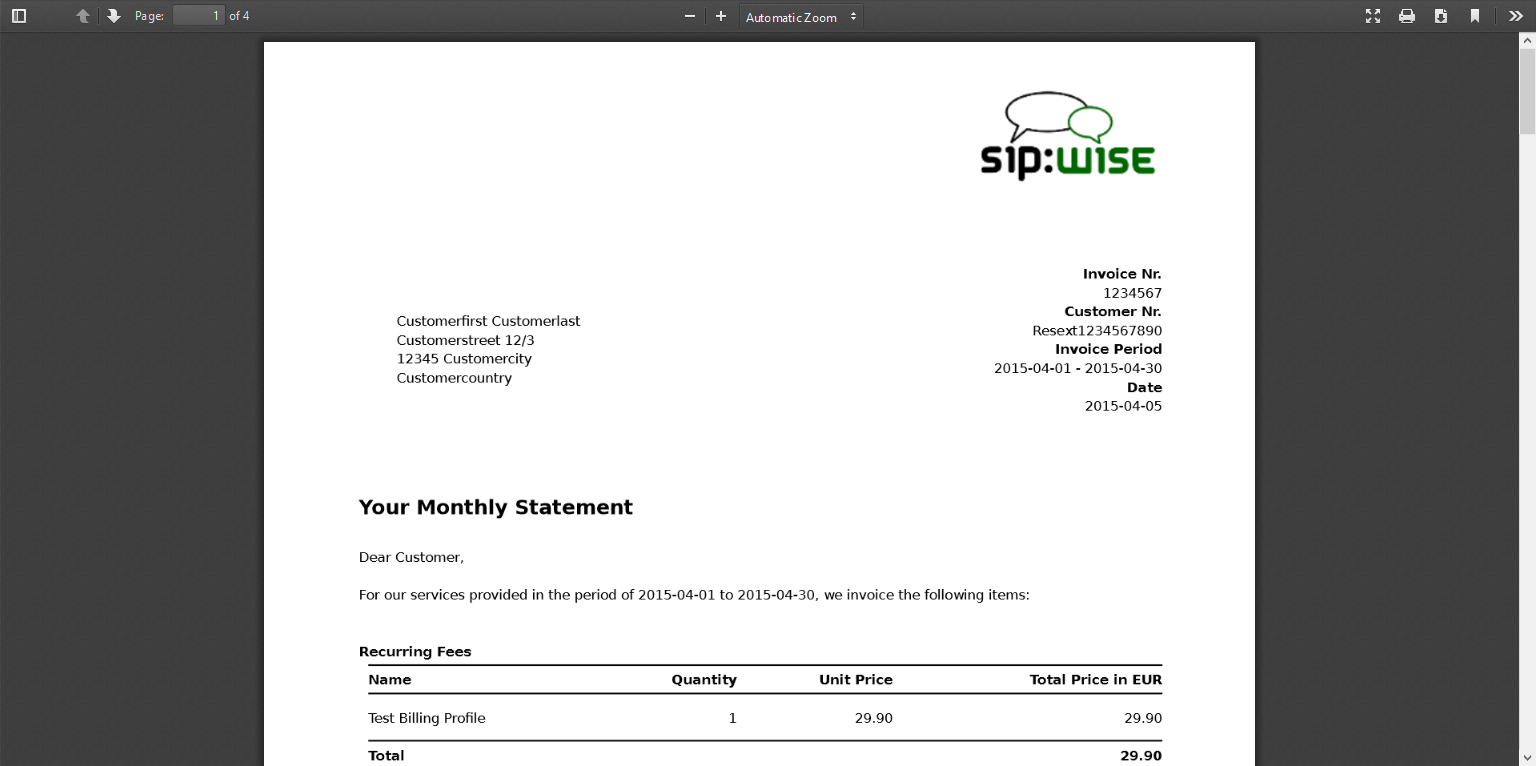
You will see message about successfully saved template. You can preview your invoice look in PDF format. Press on "Preview as PDF" button.
Invoice preview will be opened in the new window.
Example fake data will be used for preview generation. |
Except invoices generation on demand using web interface, invoices can be generated automatically for all customers using cron and invoice generator script.
Also invoice generation script is responsible for the sending generated invoices to the customers.
Script is located at: /usr/share/ngcp-panel/tools/generate_invoices.pl
In short:
perl /usr/share/ngcp-panel/tools/generate_invoice.pl --send --prevmonth
perl /usr/share/ngcp-panel-tools/generate_invoice.pl --prevmonth
perl /usr/share/ngcp-panel/tools/generate_invoice.pl --sendonly --prevmonth
perl /usr/share/ngcp-panel/tools/generate_invoice.pl --stime="2015-01-01 00:00:00" --etime="2015-01-31 00:00:00" --regenerate
Some not obvious options:
To see all possible script options use --help or --man:
/usr/share/ngcp-panel/tools/generate_invoices.pl --man
Script will be run periodically as configured by the cron files. Cron files templates can be found at:
After applying your configuration cron file will be located at:
Script uses configuration file located at: /etc/ngcp-invoice-gen/invoice-gen.conf
Except common DB connection configuration following specific options can be defined in the config file:
Comma separated resellers id. Invoice generation will be performed only for the specified resellers.
Comma separated customers id. Invoice generation will be performed only for the specified customers.
Usually is not necessary. Script option --prevmonth will define correct start and end time for the previous month billing period. Generated invoices will include all calls with call start time more then STIME value and less the ETIME value.
Usually is not necessary. Script option --prevmonth will define correct start and end time for the previous month billing period. Generated invoices will include all calls with call start time more then STIME value and less the ETIME value.
Generated invoices will be immediately sent to the customers.
Invoices, already sent to the customers, will be sent again.
Already presented invoices files will be generated again. Otherwise they will stay intouched.
Generate invoices for the already terminated customers too.
Purposed for notifications about invoices generation fails. Not in use now.
All generated invoices can be seen in the invoice management interface Section 10.1, “Invoices management”.
On request each invoice will be sent to the proper customer as e-mail with the invoice PDF in the attachment. Letter content is defined by the invoice email template.
| | ||