| |
| |
The sip:provider CE provides a large amount of subscriber features in order to offer compelling VoIP services to end customers, and also to cover as many deployment scenarios as possible. In this chapter, we will go over the features and describe their behavior and their use cases.
There are two different methods to provide fine-grained call admission control to both subscribers and admins. One is Block Lists, where you can define which numbers or patterns can be called from a subscriber to outbound direction and which numbers or patterns are allowed to call a subscriber in inbound direction. The other is NCOS Levels, where the admin predefines rules for outbound calls, which are grouped in certain levels. The user can then just choose the level, or the admin can restrict a user to a certain level. Also sip:provider CE offers some options to restrict the IP addresses that subscriber is allowed to use the service from. The following chapters will discuss these features in detail.
Block Lists provide a way to control which users/numbers are able to call or to be called, based on a subscriber level, and can be found in the Call Blockings section of the subscriber preferences.

Block Lists are separated into Administrative Block Lists (adm_block_*) and Subscriber Block Lists (block_*). They both have the same behavior, but Administrative Block Lists take higher precedence. Administrative Block Lists are only accessible by the system administrator and can thus be used to override any Subscriber Block Lists, e.g. to block certain destinations. The following break-down of the various block features apply to both types of lists.
Block lists can either be whitelists or blacklists and are controlled by the User Preferences block_in_mode, block_outmode__ and their administrative counterparts.
You can change a list mode from one to the other at any time.
The list contents are controlled by the User Preferences block_in_list, block_out_list and their administrative counterparts. Click on the Edit button in the Preferences view to define the list entries.
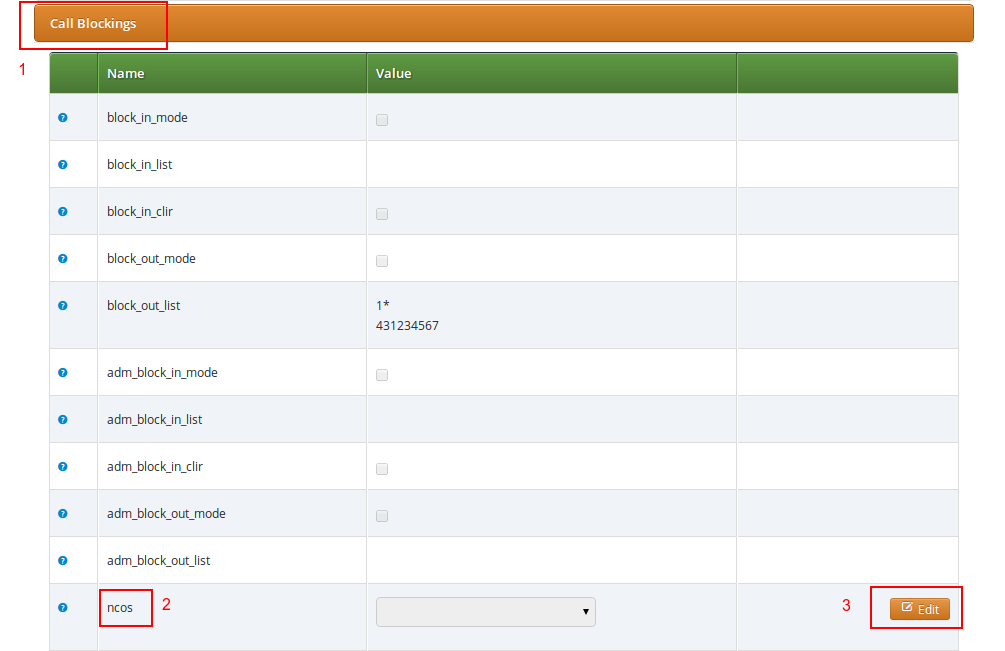
In block list entries, you can provide shell patterns like * and []. The behavior of the list is controlled by the block_xxx_mode feature (so they are either allowed or rejected). In our example above we have block_out_mode set to blacklist, so all calls to US numbers and to the Austrian number +431234567 are going to be rejected.
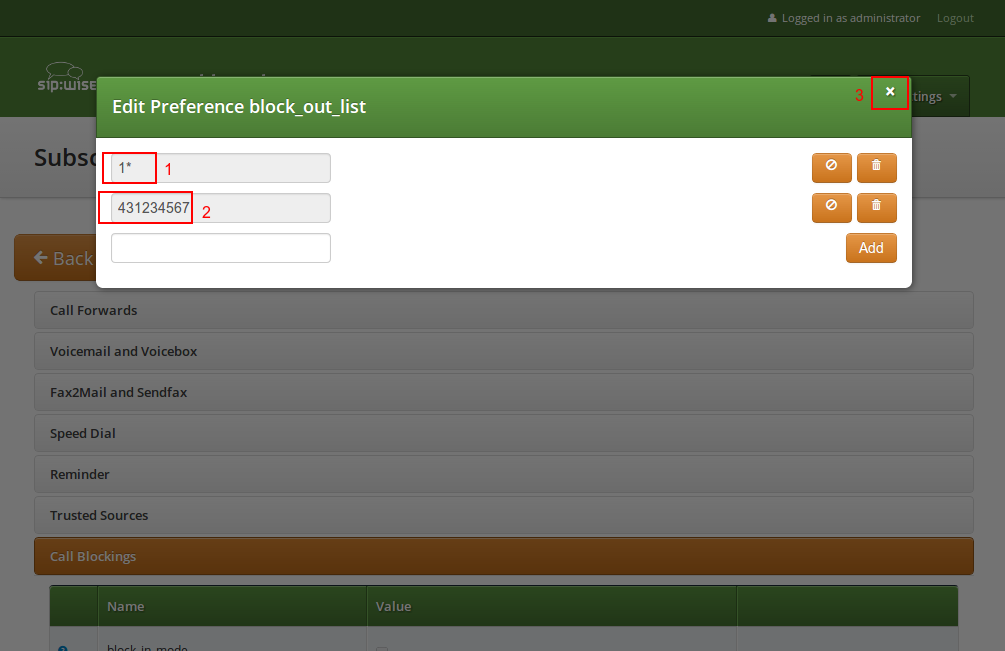
Click the Close icon once you’re done editing your list.
For incoming call, the User Preference block_in_clir and adm_block_in_clir controls whether or not to reject incoming calls with number supression (either "[Aa]nonymous" in the display- or user-part of the From-URI or a header Privacy: id is set). This flag is independent from the Block Mode.
NCOS Levels provide predefined lists of allowed or denied destinations for outbound calls of local subscribers. Compared to Block Lists, they are much easier to manage, because they are defined on a global scope, and the individual levels can then be assigned to each subscriber. Again there is the distinction for user- and administrative-levels.
NCOS levels can either be whitelists or blacklists.
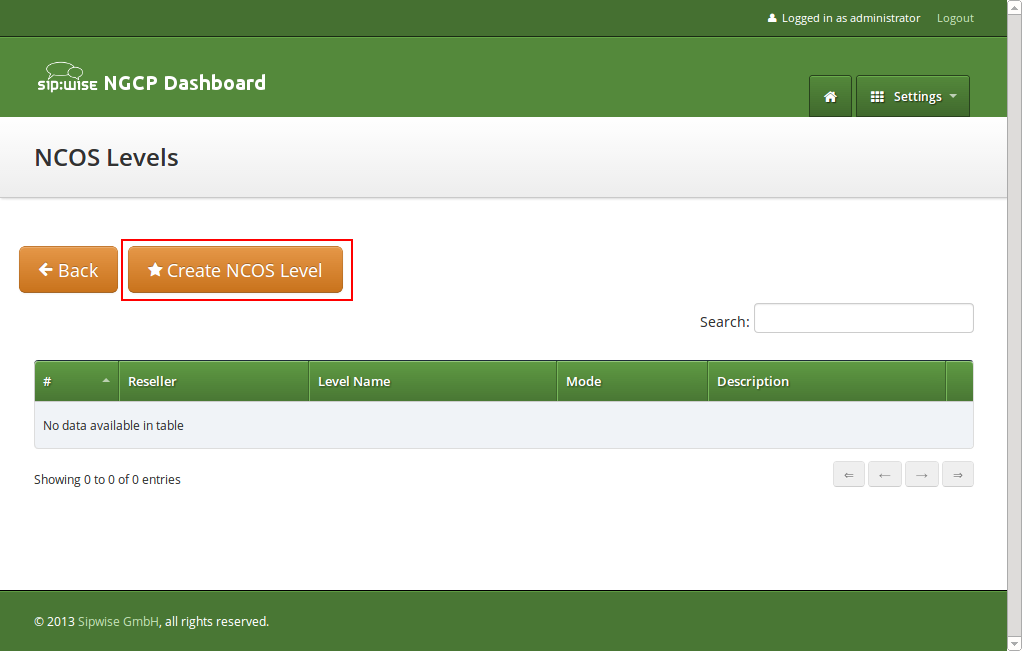
To create an NCOS Level, go to Settings→NCOS Levels and press the Create NCOS Level button.
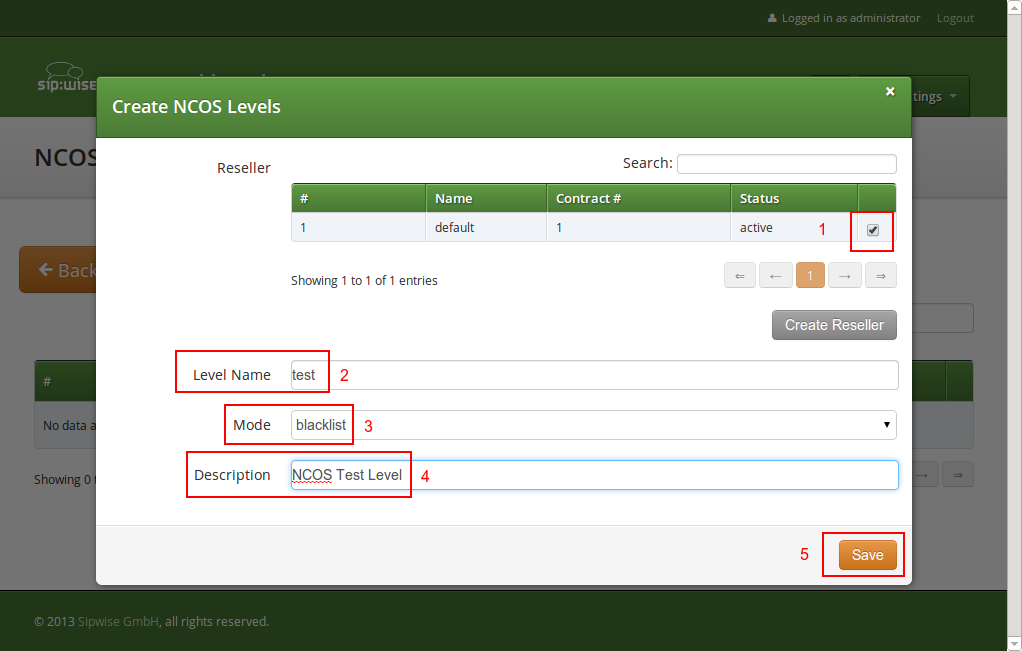
Select a reseller, enter a name, select the mode and add a description, then click the Save button.
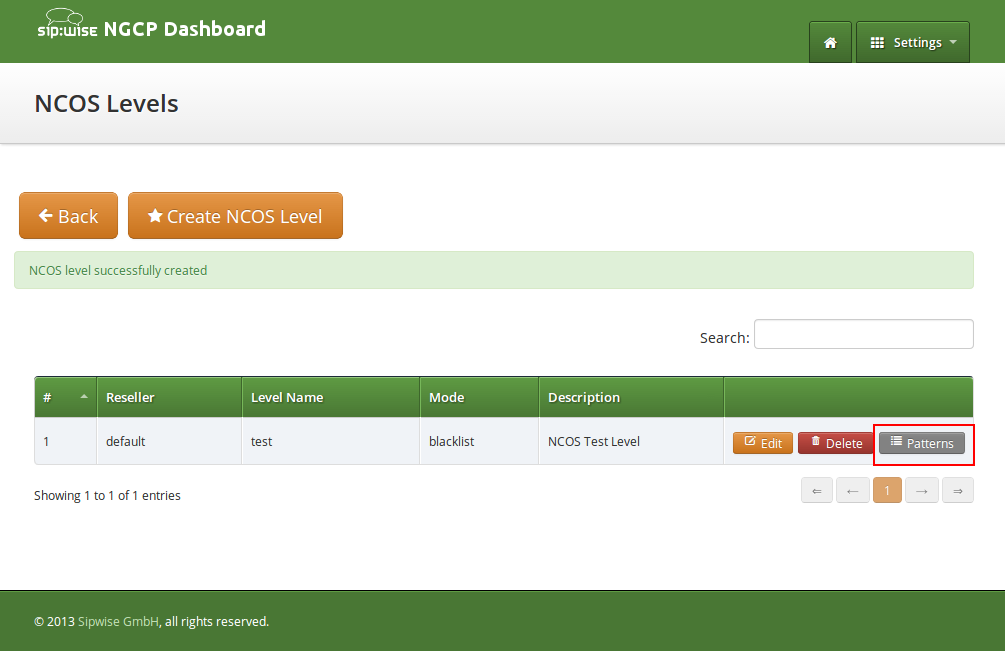
To define the rules within the newly created NCOS Level, click on the Patterns button of the level.
In the Number Patterns view you can create multiple patterns to define your level, one after the other. Click on the Create Pattern Entry Button on top and fill out the form.
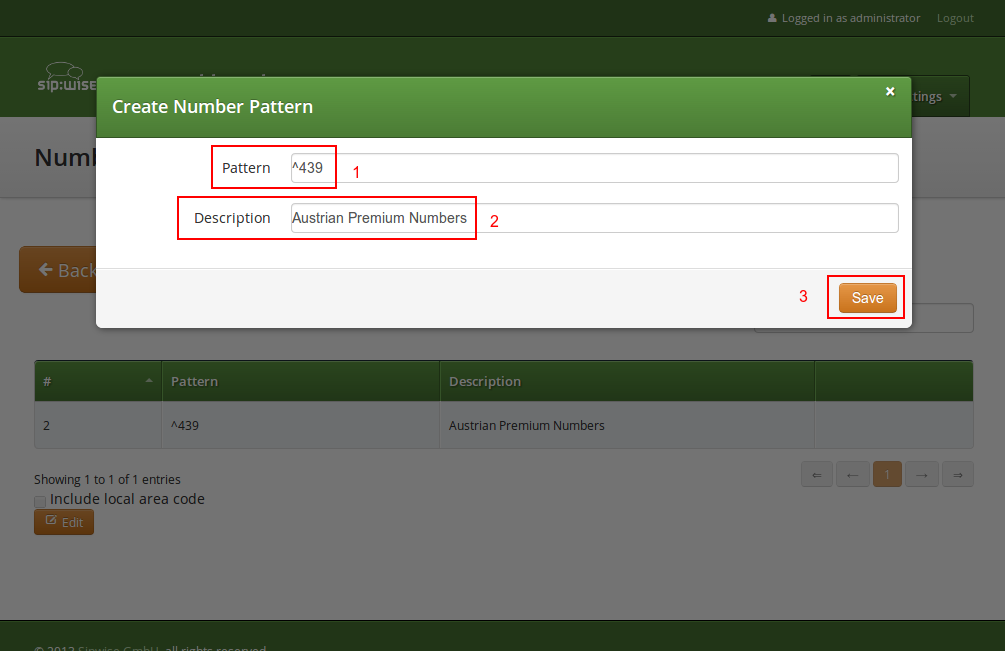
In this example, we block (since the mode of the level is blacklist) all numbers starting with 439. Click the
Save button to save the entry in the level.
The option include local area code in list for a blacklist means that calls within the area code of the subscribers are
denied, and for whitelist that they are allowed, respectively. For example if a subscriber has country-code 43 and area-code 1,
then selecting this checkbox would result in an implicit entry ^431.
Once you’ve defined your NCOS Levels, you can assign them to local subscribers. To do so, navigate to Settings→Subscribers, search for the subscriber you want to edit, press the Details button and go to the Preferences View. There, press the Edit button on either the ncos or admncos setting in the Call Blockings__ section.
You can assign the NCOS level to all subscribers within a particular domain. To do so, navigate to Settings→Domains, select the domain you want to edit and click Preferences. There, press the Edit button on either ncos or admin_ncos in the Call Blockings section.
Note: if both domain and subscriber have same NCOS preference set (either ncos or adm_ncos, or both) the subscriber’s preference is used. This is done so that you can override the domain-global setting on the subscriber level.
The sip:provider CE provides subscriber preference allowed_ips to restrict the IP addresses that subscriber is allowed to use the service from. If the REGISTER or INVITE request comes from an IP address that is not in the allowed list, the sip:provider CE will reject it with a 403 message. Also a voice message can be played when the call attempt is rejected (if configured).
By default, allowed_ips is an empty list which means that subscriber is not restricted. If you want to configure a restriction, navigate to Settings→Subscribers, search for the subscriber you want to edit, press Details and then Preferences and press Edit for the allowed_ips preference in the Access Restrictions section.
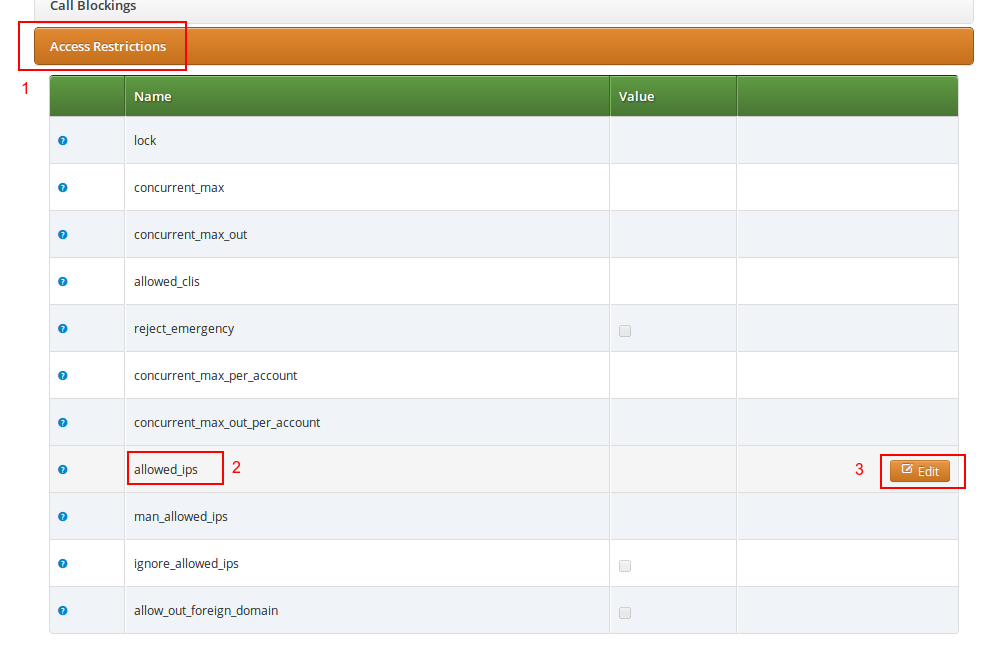
Press the Edit button to the right of empty drop-down list.
You can enter multiple allowed IP addresses or IP address ranges one after another. Click the Add button to save each entry in the list. Click the Delete button if you want to remove some entry.
The sip:provider CE provides the capabilities for normal call forwarding (deflecting a call for a local subscriber to another party immediately or based on events like the called party being busy or doesn’t answer the phone for a certain number of seconds) and serial call hunting (sequentially executing a group of deflection targets until one of them succeeds). Targets can be stacked, which means if a target is also a local subscriber, it can have another call forward or hunt group which is executed accordingly.
Call Forwards and Call Hunting Groups can either be executed unconditionally or based on a Time Set Definition, so you can define deflections based on time period definitions (e.g. Monday to Friday 8am to 4pm etc).
Go to your Subscriber Preferences and click Edit on the Call Forward Type you want to set (e.g. Call Forward Unconditional.
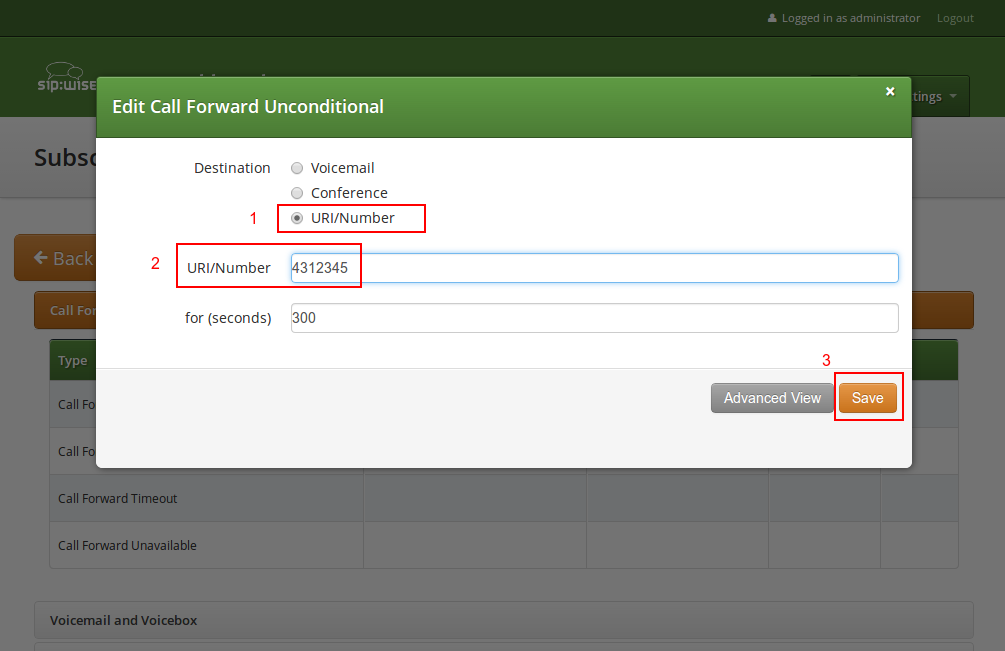
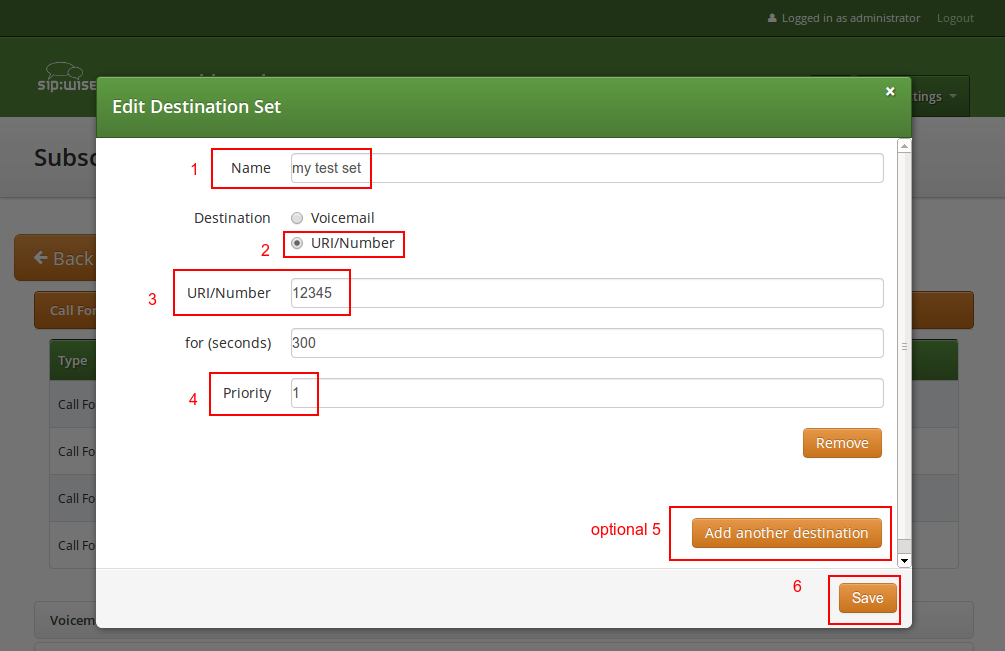
If you select URI/Number in the Destinatio field, you also have to set a URI/Number. The timeout defines for how long this destination should be tried to ring.
If you want multiple destinations to be executed one after the other, you need to change into the Advanced View when editing your call forward. There, you can select multiple Destination Set/Time Set pairs to be executed.
A Destination Set is a list of destinations to be executed one after another.
A Time Set is a time definition when to execute this Destination Set.
Click on Manage Destination Sets to see a list of available sets. The quickset_cfu has ben implicitely created during our creation of a simple call forward. You can edit it to add more destinations, or you can create a new destination set.
When you close the Destination Set Overview, you can now assign your new set in addition or instead of the quickset_cfu set.
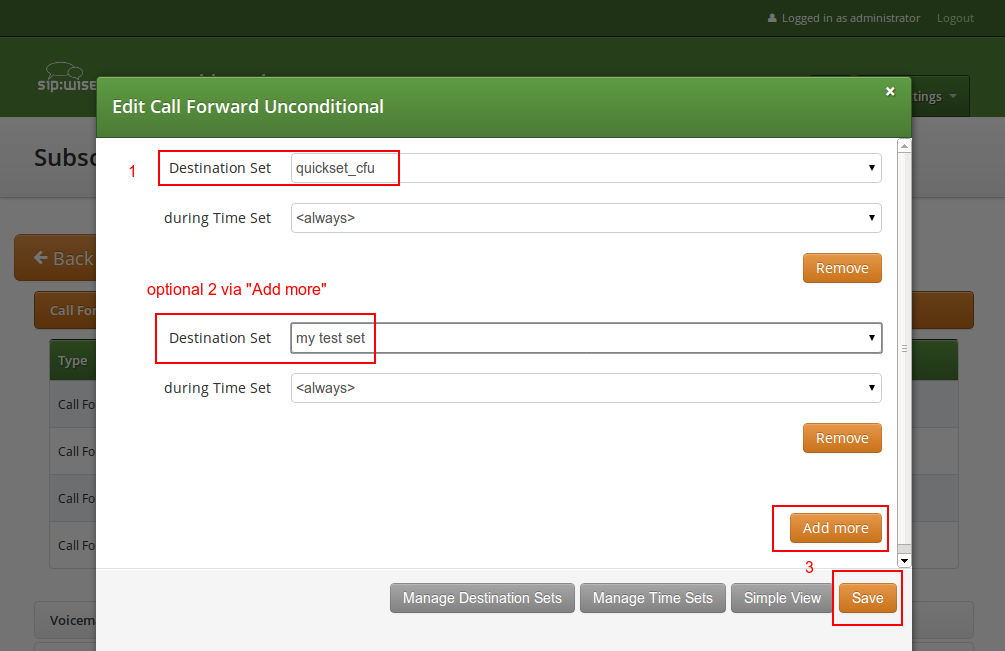
Press Save to store your settings.
Click on Manage Time Sets in the advanced call-forward menu to see a list of available time sets. By default there are none, so you have to create one.
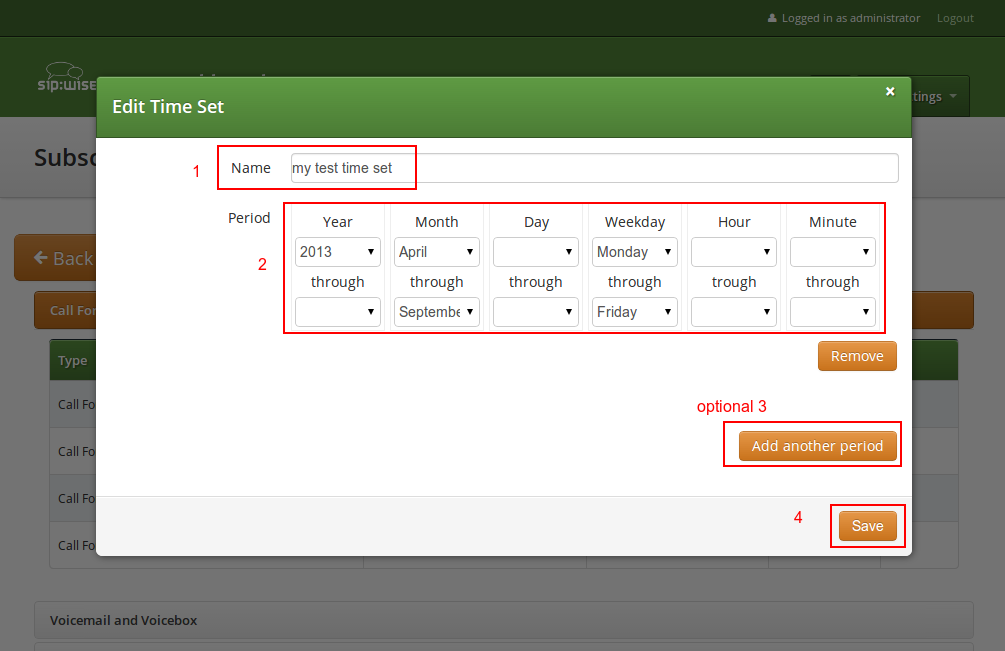
You need to provide a Name, and a list of Periods where this set is active. If you only set the top setting of a date field (like the Year setting in our example above), then it’s valid for just this setting (like the full year of 2013 in our case). If you provide the bottom setting as well, it defines a period (like our Month setting, which means from beginning of April to end of September).
the period is a through definition, so it covers the full range. If you define an Hour definition 8-16, then this means from 08:00 to 16:59:59 (unless you filter the Minutes down to something else). |
If you close the Time Sets management, you can assign your new time set to the call forwards you’re configuring.
The preferences a subscriber can provision by himself via the CSC can be limited via profiles within profile sets assigned to subscribers.
Profile sets define containers for profiles. The idea is to define profile sets with different profiles by the administrator (or the reseller, if he is permitted to do so). Then, a subscriber with administrative privileges can re-assign profiles within his profile sets for the subscribers of his customer account.
Profile Sets can be defined in Settings→Subscriber Profiles. To create a new Profile Set, click Create Subscriber Profile Set.
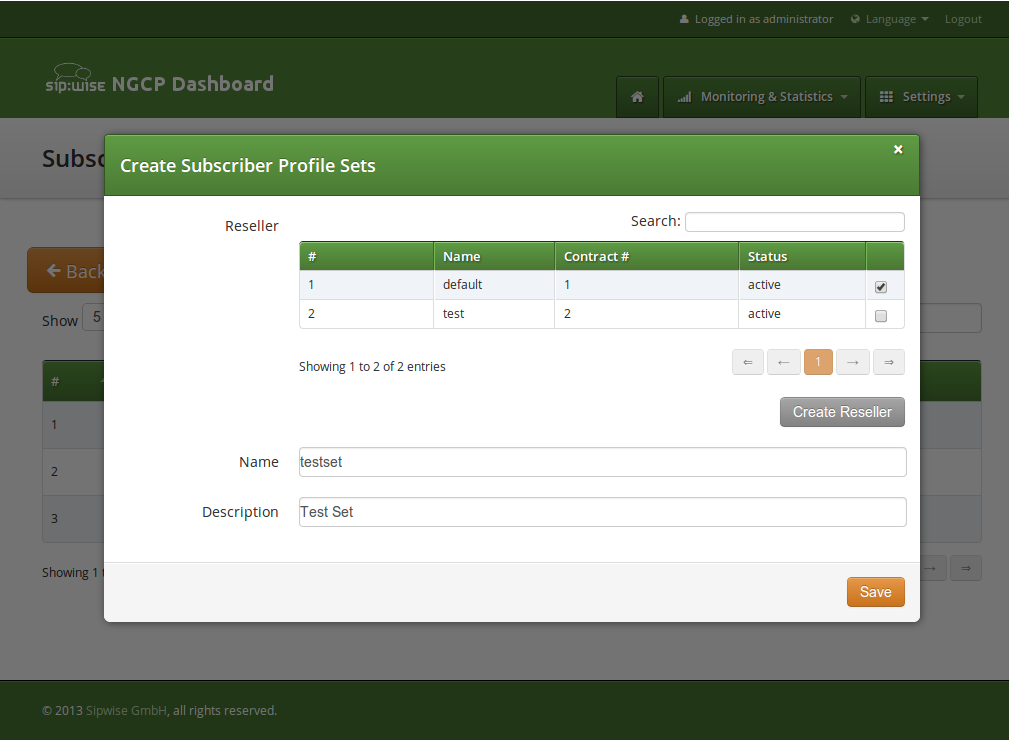
You need to provide a reseller, name and description.
To create Profiles within a Profile Set, hover over the Profile Set and click the Profiles button.
Profiles within a Profile Set can be created by clicking the Create Subscriber Profile button.
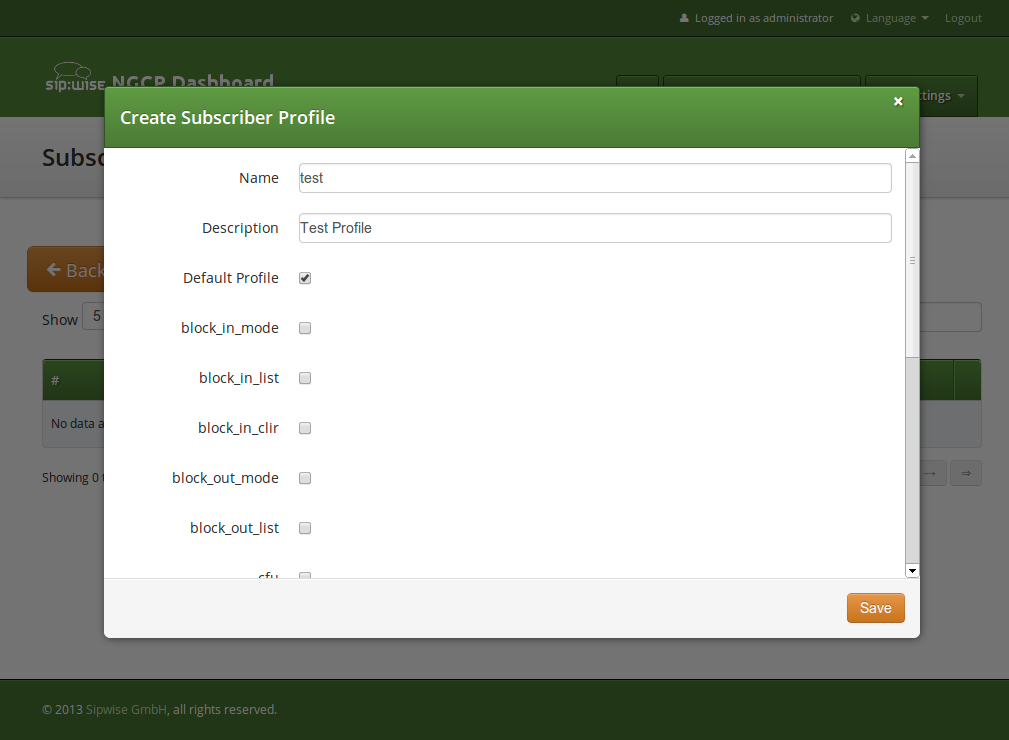
Checking the Default Profile option causes this profile to get assigned automatically to all subscribers, who have the profile set assigned. Other options define the user preferences which should be made available to the subscriber.
The following list shows you how the voicebox menu is structured.
1 Read voicemail messages
3 Advanced options
9 Save message in a folder
2 Change folders
3 Advanced Options
0 Mailbox options
1 Record your unavailable message
2 Record your busy message
3 Record your name
4 Record your temporary greetings
| | ||